Tag: Construction

  • Barndominium Hidden Costs – Avoid Surprises During Construction

    With barndominium builds you must plan beyond the headline price, because site preparation, utility hookups, foundation upgrades, insulation and finishing choices, permitting delays, and contractor change orders often inflate costs; you can protect your budget by conducting thorough site surveys, getting detailed bids, verifying material and labor scopes, allocating a contingency, and closely managing change orders throughout construction.

    Key Takeaways:

    • Site preparation and foundation expenses-grading, soil remediation, septic and utility hookups often exceed initial estimates.
    • Envelope and systems costs-proper insulation, HVAC, plumbing and electrical upgrades for metal shells can add significantly to budgets.
    • Permits, change orders and delays-permit fees, design changes, inspections and contractor contingencies frequently drive up final costs.

    Understanding Barndominiums

    You need to separate structural systems, finishes, and utility work to spot hidden expenses: metal shell options (pole, steel frame) cut framing time to days, yet converting that shell into a 1,500-3,000 ft² home typically adds $50-$120 per ft² for insulation, HVAC, plumbing, and finishes-often exceeding initial shell quotes by 25-60%.

    What is a Barndominium?

    You’re looking at a hybrid building where an agricultural-style shell becomes primary living space; sizes commonly fall between 1,200 and 3,000 ft², and builds range from simple pole-barn shells to engineered steel-clear-span structures. For example, a bare 2,000 ft² shell might cost $30,000-$80,000, while full interior finishes often double that figure.

    Benefits of Barndominiums

    You gain faster construction, open-plan flexibility, and lower framing labor compared with conventional stick-built homes; typical framing savings run 10-30%. Durable metal exteriors reduce long-term maintenance, and integrated shop or storage space adds utility value that can boost resale appeal in rural markets.

    You should weigh those advantages against trade-offs: combining living and workshop space can force higher mechanical and fire-separation costs-upgrading insulation to R-30+ and installing a dedicated HVAC zone or commercial exhaust can add $5,000-$25,000. In practice, some owners save on framing but spend more on high-performance insulation, soundproofing, and custom finishes.

    Common Hidden Costs

    Beyond framing and finishes, you’ll face site-specific expenses that often push budgets up 10-30%. Grading and erosion control can add $1,000-$7,000, soil remediation $2,000-$20,000, and unexpected permit or inspection fees another $500-$2,500. You should factor in access work like driveways or culverts ($1,200-$8,000) and contingency for weather delays that increase labor and equipment rental days.

    Land Preparation Expenses

    You’ll likely pay for tree removal ($200-$2,000 per tree), stump grinding, and mass grading to achieve proper drainage; grading alone often runs $1,000-$7,000. Retaining walls or soil stabilization can add $2,000-$15,000, while required erosion-control measures and wetlands mitigation may tack on several thousand dollars and require specialized contractors and permits.

    Utilities and Infrastructure Costs

    You should budget for utility hookups: electric service can range from $1,000 to $15,000 depending on distance to the grid, well drilling typically $3,000-$15,000, and septic systems $3,000-$10,000. Road access, driveway surfacing, and culverts often add $1,200-$8,000, and municipal connection fees or impact assessments can be $500-$5,000 more.

    Trenching averages $10-$25 per foot, so a 200‑ft run at $20/ft adds $4,000; transformer or pole charges may be another $1,000-$5,000. You’ll also face permit, inspection, and inspection re‑test costs ($500-$2,000) and, for remote sites, consider off‑grid options like solar-plus-battery, which typically cost $15,000-$50,000 installed.

    Construction Costs Beyond the Basics

    Expect line items that don’t appear on initial bids: engineered trusses, third‑party inspections, crane rentals, and mobilization fees can push your budget 10-30% higher; for example, crane setup for roof lifts often costs $1,200-$4,000 and special inspections or engineering reports typically run $800-$4,000 depending on complexity.

    Specialized Contractors

    You’ll pay premiums for trades with specific barndominium experience: welders for custom metal framing may bill $75-$120/hr, HVAC contractors for ductless heat pumps $8,000-$20,000 installed, and septic installers $3,000-$10,000; remote sites add mobilization fees of $500-$3,000 and change orders from specialty subs compound quickly.

    Material Upgrades and Customizations

    Upgrading materials can shift costs dramatically-moving from basic ribbed metal siding ($3-$5/sq ft) to insulated standing‑seam ($8-$12/sq ft) or choosing spray foam over fiberglass can add 10-40% to your material budget and affect installation timeframes.

    Specific examples show the impact: triple‑pane windows run $600-$1,200 each vs. vinyl at $200-$400, custom cabinets often start at $12,000 compared to $5,000 for stock, and polished concrete floors typically cost $3-$8/sq ft while hardwood is $6-$12/sq ft-small selections scale across a 2,000 sq ft build and can add tens of thousands to the final price.

    Financing and Insurance Considerations

    Loan Options for Barndominiums

    Construction-to-perm loans are the most common route, often requiring 20-25% down with interest-only draws during a 6-12 month build before converting to a 15-30 year mortgage. Conventional lenders may classify a barndominium as residential or agricultural-classification affects rates and documentation. USDA and VA loans can work in rural areas if the structure meets primary-residence rules, while appraisers frequently rely on a cost approach when comparable sales are scarce, so provide detailed plans, budgets, and builder contracts to your lender.

    Insurance Coverage for Unique Structures

    During construction you’ll need builder’s risk insurance to cover materials and losses; after completion standard homeowner policies sometimes exclude nontraditional shells, so expect endorsements for metal roofing, detached shops, or open-floor agricultural elements. Insurers will assess wind/hail exposure, replacement-cost estimates, and occupancy use-premiums can be higher if the home is classified nonresidential-so confirm lender-required hazard and, if applicable, flood insurance early to avoid coverage gaps at closing.

    Builder’s risk premiums typically run about 1-3% of project value annually, and replacement-cost estimates for finished barndominiums often range $100-$200 per sq ft depending on finishes, which directly affects insured value. You should shop specialty carriers familiar with post-frame or steel-paneled homes, secure a certificate of insurance from your contractor, document progress with photos and receipts for faster claims, and verify whether endorsements for wind, hail, or detached workshops are included or must be added separately.

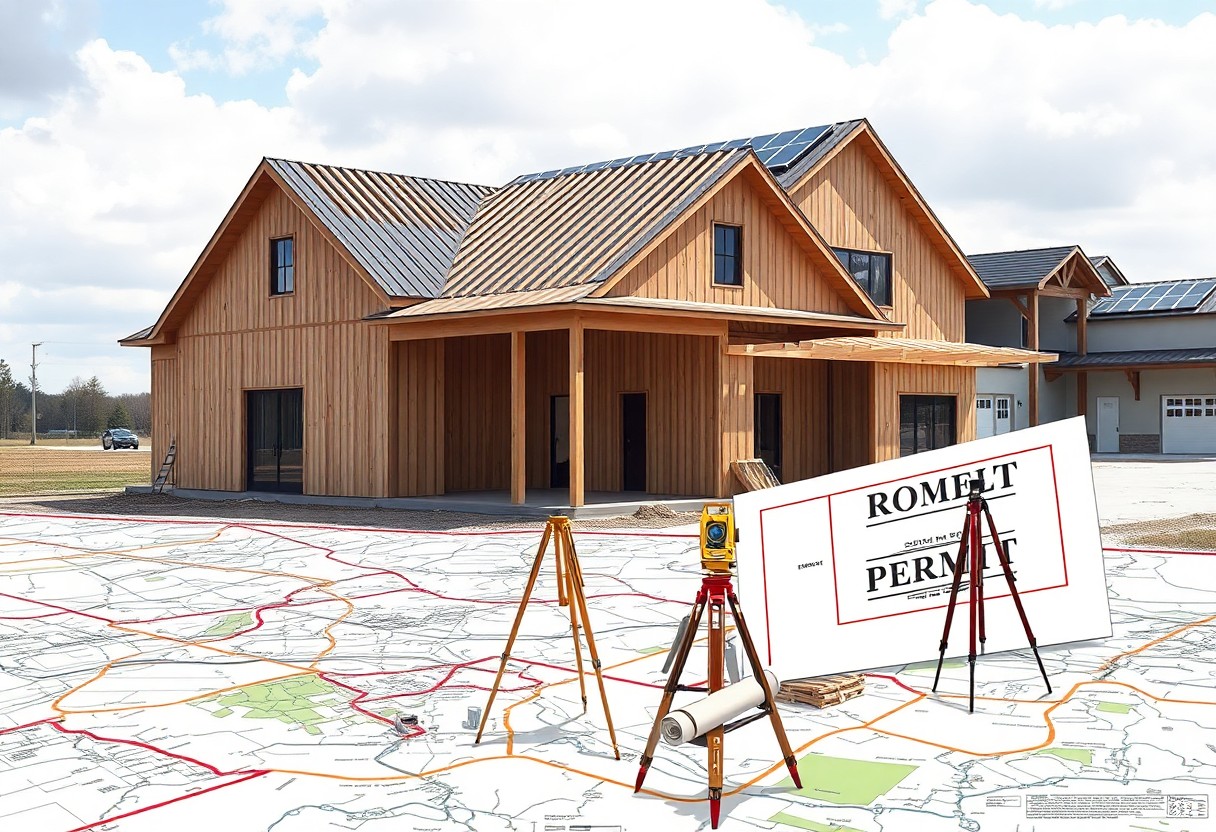
    Permitting and Regulatory Fees

    Expect permitting and regulatory fees to add $1,000-$10,000 to your barndominium budget, or roughly 0.5-3% of total construction costs depending on location. Building permits, plan review, impact fees, utility hookup charges, and inspections are typical line items. In many counties your permit total rises if valuation‑based fees apply (commonly 0.5-2% of declared project value) or if special permits are needed for wetlands, driveways, or accessory dwelling classifications.

    Zoning Requirements

    Zoning can force design changes or extra steps: you may need a variance, conditional use permit, or rezoning if agricultural-to-residential rules conflict. Application fees commonly run $500-$3,000 and public hearings can extend processing 4-12 weeks; rural jurisdictions sometimes take longer. If your lot sits in an agricultural zone expect setbacks, septic density limits, or HOA covenants to require plan revisions that bump costs and schedule.

    Permit Costs

    Permit costs cover building permits, plan review, and trade permits (electrical, plumbing, mechanical). Typical ranges: building permits $200-$5,000, trade permits $50-$500 each, septic and well permits $300-$2,000, and impact or school fees $1,000-$5,000 in some jurisdictions. Inspection fees and re‑inspection charges can add several hundred dollars if changes are made after approval, so tally each category when estimating.

    Many jurisdictions calculate permit fees from your declared construction valuation at rates between about 0.5% and 2%-so a $250,000 build could mean $1,250-$5,000 in base fees. Plan review can take 2-8 weeks and may cost 25-50% of the building permit; resubmissions often incur extra charges. You should request a written fee schedule from the local building department, budget a 10-15% permitting contingency, and factor time delays into your financing hold costs.

    Budgeting for Future Maintenance

    Plan on allocating 1-3% of your barndominium’s replacement cost annually for routine upkeep and small repairs; on a $300,000 build that’s roughly $3,000-$9,000 per year. Factor in predictable line items like annual HVAC servicing ($100-$300), gutter cleaning ($100-$250), and periodic exterior resealing so your long‑term budget isn’t derailed by predictable lifecycle costs.

    Long-term Care Costs

    Expect major component replacements on timelines: metal roof recoating or panel replacement every 8-15 years ($1,500-$6,000), HVAC replacement at 15-20 years ($5,000-$10,000), and septic pump‑outs every 3-5 years ($300-$700). You should also budget for slab settlement or foundation repair ($500-$4,000) and occasional siding or insulation repairs specific to metal‑frame assemblies.

    Emergency Fund Planning

    Allocate a dedicated emergency fund for unexpected structural or systems failures-aim for 3-6 months of household expenses plus a repair reserve equal to 1-3% of the building value (e.g., $3,000-$9,000 on a $300K barndo). Keep these funds liquid in a high‑yield savings account so you can pay for urgent deliveries, contractor emergency calls, or immediate parts replacements without borrowing.

    Use an annualized approach to size your monthly savings: divide major replacement costs by their expected lifespans and add routine expenses. For example, roof recoating $3,200/10 years = $320/yr; HVAC $7,000/18 years = $389/yr; septic $500/4 years = $125/yr; total ≈ $834/yr, or about $70/month. Allocate that monthly amount to a labeled account and top it up after any large claim or major repair.

    To wrap up

    To wrap up, you should budget for hidden barndominium costs like site prep, utility hookups, unexpected structural upgrades, and upgraded finishes; secure detailed contracts, contingency funds (10-20%), and trusted contractors, and conduct regular inspections so you can catch scope changes early and keep your project on schedule and within budget.

    FAQ

    Q: What are the most common hidden costs that show up during barndominium construction?

    A: Unexpected site conditions (rock, poor soil, high water table, or required drainage corrections) frequently drive up foundation and grading costs; extended excavation, rock removal, or engineered footings may be needed. Utility connections and off-site fees – water, sewer or septic design and permits, electrical service upgrades, transformer or trenching costs, and long service runs – add surprise charges. Changes to plans or upgrades to finishes (better insulation, upgraded windows, higher-end cabinetry, or specialty HVAC) quickly exceed builder allowances. Delivery and equipment charges – oversized material shipping, crane rental, and hard-to-reach-site premiums – are often omitted from initial estimates. Inspection fees, specialized testing (geotechnical, septic perc tests), impact fees, and municipal requirements can create extra line items. Weather delays and labor shortages increase schedule-dependent costs like temporary power, site security, and extended subcontractor mobilization. Finally, waste disposal, dumpster service, staging or storage for materials, and final cleanup or landscaping are frequently underestimated.

    Q: How should I budget for unknowns and control change-order costs?

    A: Set a contingency fund (typically 10-20% of the construction budget based on site risk) and treat allowances as placeholders, not firm numbers. Require the contract to detail allowances and the process for approving upgrades so you see cost impacts before work begins. Lock major selections (HVAC type, insulation R-value, window performance, roofing, and floor systems) early to avoid mid-build change orders. Insist on a formal written change-order procedure that includes scope, cost, time impact, and signed authorization before work proceeds; cap contractor markup percentages for changes. Obtain a geotechnical report and utility feasibility early to reduce surprises. Use fixed-price bids for defined scopes when possible or include maximum guaranteed price clauses. Keep detailed records of decisions and approvals and require lien waivers from subcontractors at payment milestones to reduce financial exposure.

    Q: What contract terms and protections should I include to avoid surprise invoices and disputes?

    A: Use a clear, itemized scope of work and include references to plans, specifications, and allowances; require the builder to disclose subcontractor quotes and permit fees prior to signing. Specify payment schedules tied to completed milestones, include a reasonable retainage percentage, and condition final payment on receipt of lien waivers and passing final inspections. Require the builder to provide certificates of insurance, builder’s risk insurance during construction, and worker’s compensation coverage. Include a documented change-order process with written approvals and defined markup limits for labor and materials. Add clauses for handling unforeseen site conditions (who pays for geotech-recommended corrections), dispute resolution (mediation/arbitration), and a completion/punch-list timeline. Include warranty terms, maintenance requirements, and an itemized list of buyer-supplied items to prevent scope gaps that lead to extra charges.

  • “Barndominium Legal Zoning 101 – What You Must Know Before You Build”

    Over the course of planning your build, you must verify local zoning designations, permitted uses, setbacks, height limits, required permits, inspections and any HOA or county restrictions so your barndominium complies from foundation to occupancy; consult zoning maps, speak with planning staff, and apply for variances early to prevent costly delays.

    Key Takeaways:

    • Verify zoning and land‑use designation for your parcel-confirm barndominiums are permitted or pursue rezoning, variances, or conditional‑use permits; check setbacks, height limits, lot coverage, and permit requirements before purchasing or building.
    • Confirm applicable building codes and structural requirements for metal/post‑frame construction, secure required engineering plans and inspections, and plan for utility connections, septic/drainage rules, and fire/energy compliance.
    • Review HOA covenants, easements, and local ordinances; evaluate financing and insurance options for nontraditional dwellings and budget for permit fees, impact fees, and potential site‑improvement costs and delays.

    Understanding Zoning Laws

    When assessing your parcel, zoning maps and local code sections determine whether a barndominium is allowed, what uses are permitted, and what limitations apply – typical setbacks range 20-50 feet, minimum lot sizes often span 1-5 acres, and height caps commonly sit between 35-45 feet; you must check both zoning designation and any overlay districts or recorded covenants that can add extra restrictions.

    Definition of Zoning

    Zoning is your municipality’s tool for dividing land into categories (for example, R for residential, A for agricultural, C for commercial, M for industrial) and specifying permitted uses, density, setbacks, and lot coverage; you consult the zoning ordinance to see if a barndominium is explicitly allowed, allowed with conditions, or prohibited.

    Types of Zoning Designations

    Common designations affecting barndominiums include Agricultural (A‑1) which often permits farm residences and accessory structures, Rural Residential or RR for larger-lot single-family uses, R‑1 for conventional single-family with stricter aesthetics, C zones that usually restrict residential uses, and M or industrial that sometimes allow metal buildings but impose commercial standards.

    • Check A‑1 and RR zones first if you want minimal design restrictions and farm-use allowances.
    • Expect R‑1 to impose design, material, and lot coverage limits that can block metal-clad exterior finishes.
    • Investigate C or M zoning only if you plan mixed commercial/residential use or can rezone.
    • After you identify the designation, confirm setbacks, height limits, and accessory building rules in the ordinance.
    Designation Typical Uses / Notes
    A‑1 (Agricultural) Allows farm dwellings, accessory buildings; often permits metal structures with fewer design controls.
    RR (Rural Residential) Large-lot single-family; may allow hobby farms and detached workshops subject to acreage minimums.
    R‑1 (Residential Single‑Family) Strict aesthetics, setbacks, and materials; metal exteriors often restricted without variance.
    C / Commercial Primarily business use; residential may require conditional use permit or rezoning.

    Digging deeper, you should note that A‑1 often requires less than 1-5 acres for accessory dwellings while some R‑1 zones mandate minimum lot widths (e.g., 60-100 ft) and limit accessory structure footprints to a percentage of the lot; you’ll typically see permitting timelines of 30-120 days for simple permits and 60-180 days if variances or rezonings are needed, with fees ranging roughly $200-$2,000 depending on jurisdiction.

    • Gather plats, zoning map, and the specific ordinance section before applying for permits.
    • Consult the planning department for interpretation and any historic or overlay district rules.
    • Budget time for public hearings if you pursue rezoning or a variance; fees and notice periods vary.
    • After you confirm code language, file the appropriate permit, variance, or conditional-use application.
    Requirement Typical Range / Example
    Setbacks Front: 20-50 ft; side: 5-20 ft; rear: 20-40 ft.
    Minimum Lot Size Urban R‑1: 6,000-10,000 sq ft; Rural/A‑1: 1-5 acres.
    Height Limits Residential: 30-40 ft; Rural can allow 45+ ft with exceptions.
    Lot Coverage / Accessory Limits Coverage 25-40%; accessory building area often capped at 50% of primary footprint or a fixed sq ft.

    Barndominiums and Zoning Regulations

    Zoning maps, land‑use codes, and overlay districts determine whether your barndominium is allowed: agricultural (A) or rural residential (RR) zones commonly permit them, while suburban R‑1 or planned unit developments often restrict them. You must check setbacks (typically 20-50 ft), maximum lot coverage (often 25-40%), height limits (35-45 ft), and septic/well siting rules (50-100 ft separations); floodplain or conservation overlays can add elevation or foundation requirements that change project feasibility.

    Common Zoning Issues for Barndominiums

    You frequently run into permitted‑use conflicts, HOA covenants, minimum lot size requirements (0.5-5 acres in many jurisdictions), driveway/access standards, and septic or well permitting. Fire district or road‑maintenance requirements can force upgrades; for example, a county may require a minimum all‑weather access and turnouts for structures over 3,000 sq ft. Variances, conditional use permits, or rezoning are typical solutions but add time and public hearings.

    Permitted Uses and Restrictions

    Permitted uses vary: some jurisdictions treat barndominiums as primary dwellings if you finish interior living space, while others allow only agricultural or accessory uses on the same structure. You may see limits on home‑based businesses, short‑term rentals, or on‑site commercial activity; an A‑zone might allow a workshop and occasional farm sales, but an R‑1 zone could ban any nonresidential use without a conditional permit.

    When pursuing approval, expect a process: submit a site plan, floor plans, engineered foundation details, septic design, and a survey; public notice and a planning commission hearing often take 30-90 days. Fees commonly range $200-$2,000 depending on rezoning or variance scope. Also confirm which code applies-local officials may require IRC compliance for residential finishes or IBC standards for metal‑framed sections-so coordinate code classification early to avoid rework.

    Building Codes and Regulations

    Overview of Building Codes

    You’ll follow the IRC for one- and two-family dwellings (up to three stories) and the IBC for commercial or mixed-use barndominiums, while energy requirements come from the IECC. Codes cover foundation, structural framing, roof snow/wind loads, electrical, plumbing, mechanical systems, fire separation and egress. Local jurisdictions routinely adopt amendments and different code years, so verify county or city requirements, permit timelines and required inspections before finalizing your plans.

    Importance of Compliance

    If you skip code compliance you risk fines, stop-work orders, forced demolition and insurance or mortgage complications; insurers and lenders often require a certificate of occupancy before paying claims or closing loans. Inspectors verify structural, electrical and egress safety to protect occupants. Being compliant preserves resale value and limits liability-documented permits and approved inspections make your barndominium financeable and insurable.

    Insist on engineer-stamped plans for nonstandard spans or loads-open bays over about 20-30 feet often need engineered trusses and calculations. Hire licensed electricians and plumbers, schedule foundation, framing and final inspections, and keep inspection reports plus the final certificate of occupancy. Expect special inspections for concrete (28-day strength tests), welding and gas-line pressure testing in many jurisdictions; those records are often decisive in insurance disputes, lender reviews and title transfers.

    Assessing Property for Barndominium Construction

    You need to audit zoning district, minimum lot size (many rural zones allow barndominiums on 0.5-2 acres), setbacks, easements and access to utilities before buying. Check slope – grades over 15% can add 10-30% to foundation and grading costs – and verify permit timelines (county review often 30-90 days). Confirm floodplain status (FEMA Zone AE/A adds elevation requirements) and whether the parcel lies in an HOA or conservation overlay that limits exterior materials or footprint.

    Factors to Consider

    Prioritize items that directly affect buildability and cost: lot coverage limits, septic/well feasibility, road maintenance responsibility, and potential firewise vegetation requirements. You should obtain a soils report and a site plan early to avoid surprises from setbacks or utility extensions that can add $10k-$50k.

    • Zoning designation and permitted uses (AG, R‑R, R‑1) – confirm accessory dwelling rules.
    • Setbacks, easements, floodplain and FEMA map status (Zones A, AE, VE require different elevations).
    • Soil perc test results and bedrock depth; engineered foundations cost more on shallow bedrock.
    • Utility access: distance to power transformer, sewer vs septic feasibility, and well yield (gallons per minute).
    • Road access and county maintenance vs private road agreements; culvert or driveway permits can be required.
    • Thou must verify septic capacity and watershed protections, since some counties mandate 50-100 ft septic setbacks and riparian buffers.

    Land Use and Environmental Impact

    You must evaluate wetlands, endangered species habitat, and local stormwater rules early: Clean Water Act Section 404 and state permits can block fills in wetlands, and buffers commonly range 25-100 ft. Expect engineered stormwater controls when disturbed area exceeds 1 acre, and be aware that mitigation fees or on‑site restoration may be required.

    For example, a Central Texas county required a wetland delineation and 120‑day mitigation plan that added $8,000 in fees and native plant restoration after a 0.3‑acre disturbance; in Florida, building near gopher tortoise burrows triggered relocation permits costing $5k-$20k. You should commission a wetland delineation, Phase I enviro assessment, and consult the county planner and a civil engineer to size retention, calculate 100‑yr runoff, and estimate mitigation before finalizing your site purchase.

    Navigating the Permit Process

    Steps to Obtain Permits

    After confirmed zoning, start with a pre-application meeting with your building department, then submit a site survey, engineered foundation and framing plans, and septic/soils reports. Expect separate permits for building, electrical, plumbing, mechanical and septic; fees commonly range $200-$2,000 and review timelines run 2-12 weeks. Schedule inspections for footings, framing, systems and final; providing a complete packet shortens review and reduces re-submissions.

    Common Challenges and Solutions

    You’ll face zoning misclassification, setbacks, floodplain restrictions, septic failures and plan-review delays most often. Pursue a pre-application review, hire a local engineer or architect, and apply for a variance or conditional-use permit when setbacks or use conflicts arise. Using a design that meets local dimensional standards and submitting complete, stamped documents cuts rejections; retaining a builder familiar with county procedures speeds inspections and approvals.

    For example, in one Midwestern county a homeowner hit a 25-foot setback issue; by commissioning a site re-survey and engineer-stamped drainage plan, then applying for a 10-foot variance, they secured approval in eight weeks and paid about $1,200 in combined fees. If your permit is denied, you can appeal within typical 30-day windows or request administrative review; budgeting $500-$1,000 for professional support often halves time-to-approval.

    Future Trends in Barndominium Zoning

    Expect local planners to expand rural-residential and mixed‑use overlays that explicitly mention post‑frame and metal‑clad homes, with minimum lot sizes commonly staying in the 0.5-2 acre range; you should prepare for faster pre‑app meetings, emphasis on energy and stormwater compliance, and build schedules of 3-6 months when using contractor-ready plans, all of which will shift how you time permits, site work, and financing.

    Changes in Legislation

    You’ll see more jurisdictions update land‑use tables and conditional‑use rules to allow residential metal buildings; look for ordinance changes addressing setbacks, lot cover, wastewater capacity, and solar access. Some counties now reference post‑frame construction in zoning text or offer form‑based code pilots-checking state model ordinances and recent county code amendments lets you identify which permitting shortcuts or design standards apply to your parcel.

    Evolving Perceptions of Barndominiums

    Buyers and planners increasingly view barndominiums as legitimate housing when finished to residential standards: you should plan for residential‑grade insulation, windows, porches, and interior layouts of 1,200-3,000 sq ft to compete on MLS; improved curb appeal and documented compliance with IRC or local codes materially raise resale prospects and neighborhood acceptance.

    On financing and approvals, you’ll find lenders and insurers more willing to underwrite barndominiums that meet IRC/IBC standards and have comparable sales; keep detailed cost breakdowns, builder certifications, and completed inspections to support appraisals. Municipalities with successful examples often cite a handful of comps and permit histories that you can reference during your review and variance requests.

    Conclusion

    Upon reflecting on “Barndominium Legal Zoning 101 – What You Must Know Before You Build”, you should verify local zoning classifications, secure permits, assess building codes, consult planners or legal counsel, and plan site use to avoid delays and fines; proactive compliance protects your timeline, budget, and investment while ensuring your barndominium meets safety and land-use requirements.

    FAQ

    Q: Can I build a barndominium on my property?

    A: Start by confirming your property’s zoning district and permitted uses with the local planning or zoning office. Some zones expressly allow residential or agricultural structures; others require a conditional use permit, rezoning, or an agricultural-use qualification tied to active farming. Check lot size, setbacks, height limits, maximum lot coverage, floodplain and wetlands restrictions, and any conservation overlays. If the zoning code is unclear, request a zoning verification letter or pre‑application meeting; if necessary pursue rezoning or a variance (processes that involve public notice, hearings, fees, and timelines that can span weeks to months).

    Q: Which permits and inspections will I need for a barndominium?

    A: Typical requirements include a building permit plus trade permits for electrical, plumbing, mechanical and HVAC. Submittal documents usually include a site plan, engineered foundation and roof plans, floor plans, energy compliance documentation, soil/perc tests for septic, and utility connection plans. Expect staged inspections: footing, foundation, framing, rough‑ins, insulation, and final. Additional permits may be required for septic, well, driveway/culvert, septic drainfield setbacks, and any floodplain development. Fees, required professional stamps, and inspection checklists vary by jurisdiction.

    Q: How do zoning rules differ from building codes for a barndominium?

    A: Zoning controls land use, density, lot layout, setbacks, height, and permitted activities on the parcel. Building codes (e.g., IRC/IBC and local amendments) set construction and safety standards-structural, fire, egress, insulation, plumbing, and electrical. Both sets of rules apply: zoning determines whether and where you can place the structure; building codes determine how it must be built. Occupancy classification (residential vs accessory/agricultural) affects code requirements such as egress, fire separation and energy compliance, so clarify intended use early.

    Q: Do HOAs, easements, or utility access affect barndominium projects?

    A: Yes. Homeowners association covenants can restrict exterior materials, colors, rooflines, building types or require architectural approval; HOA approval is separate from municipal permits. Recorded easements, right‑of‑ways and conservation restrictions can limit building locations and site work; check plat and title documents. Utility availability and extensions (water, sewer, gas, electric) influence feasibility and cost; remote sites may require wells, septic systems or costly service extensions and impact/connection fees. Verify all restrictions before finalizing plans.

    Q: What are the options if my parcel’s zoning doesn’t allow a barndominium as planned?

    A: Options include applying for a rezoning to a district that permits your intended use, seeking a conditional use permit (CUP) if the use is permitted with conditions, or requesting a variance for dimensional exceptions like setbacks or height. Each route requires an application, supporting documents, public notice and hearings; decision criteria include compatibility, traffic, environmental impacts and neighborhood character. Engage a land‑use planner or attorney if needed, attend pre‑application meetings, and be prepared to propose mitigation (landscaping, buffers, limits on use) to improve approval chances.

  • “From Blueprint To Reality – A Step-by-Step Look At Barndominium Construction”

    With a solid blueprint and realistic timeline, you can navigate barndominium construction from foundation to finished living space with confidence; this guide walks you through site preparation, metal shell erection, insulation and systems installation, interior framing and finishes, and final inspections so you understand each phase, make informed decisions about materials and contractors, control costs and schedule, and ensure your build meets functional and code requirements.

    Key Takeaways:

    • Thorough planning and accurate blueprints set the scope: site selection, permits, and utility planning prevent delays and change orders.
    • Follow a clear construction sequence-foundation, metal shell erection, interior framing, systems, and finishes-to keep the project on schedule and control costs.
    • Budget and finish strategy matter: insulated shell, HVAC choices, and contractor selection determine long-term performance, timeline, and overall cost.

    Understanding Barndominiums

    You’ll see barndominiums marry a metal or post-frame agricultural shell with full residential interiors, typically between 1,200 and 3,000 sq ft; build timelines commonly fall in the 4-9 month range depending on site work and finishes. Pre‑engineered trusses and open-span framing let you add a 500-1,500 sq ft shop or garage within the same envelope, cutting both material and labor compared with separate structures.

    Definition and History

    You should know the term began as barn-to-home conversions in rural America and evolved into purpose-built residences using post‑frame or steel building systems; barn construction techniques date back decades, while the label “barndominium” gained mainstream attention in the 2010s as prefab metal shells and DIY culture made them accessible to homeowners and builders alike.

    Benefits of Barndominium Living

    You get fast construction, high durability, and flexible floor plans that accommodate combined living and workspaces-per-square-foot costs often range $70-$150 depending on finishes, and metal exteriors substantially lower long‑term maintenance. Also, the open-span structure simplifies mechanical routing and gives you efficient, highly adaptable interiors compared with typical stick-built layouts.

    For more detail, you can leverage several concrete advantages: spray-foam or insulated-panel strategies push living-space R-values into the R-20-R-38 range for good energy performance; integrating a 1,000 sq ft shop into the same thermal envelope typically saves against building two separate structures; and in many rural zones permitting and site prep reduce development time. Prepare for lender and appraisal considerations-some financing requires builder experience-but the combination of speed, lower exterior upkeep, and customization makes barndos attractive for owner-builders and contractors seeking value and versatility.

    Planning Your Barndominium

    Prioritize permitting, site work, and a realistic schedule up front: expect 4-9 months from breaking ground to move-in for most builds, with permitting and site preparation taking 2-8 weeks. Budget for unforeseen site costs-graded driveways, drainage, and utility hookups can add $5,000-$25,000 depending on distance to mains. You should also lock in a contingency of 10-15% and get engineered plans to avoid costly mid-build changes.

    Choosing the Right Location

    Evaluate zoning, access, and utilities before committing: confirm zoning allows residential and accessory shop use, run a perc test for septic, and verify power and water availability. Aim for 1-5 acres for privacy and future expansion, avoid floodplains and steep slopes that inflate site prep, and factor setback requirements (commonly 20-50 ft) plus road access-gravel driveway construction can cost $6,000-$20,000 depending on length and terrain.

    Designing Your Space

    Decide early how much of your footprint is living versus shop-typical barndos range 1,200-3,000 sq ft with shop areas from 400-1,200 sq ft-and plan ceiling heights (12-16 ft for shop bays, 8-10 ft for living). Incorporate a clear thermal strategy: aim for wall R‑values around R‑20 and roof R‑38 in cold climates or equivalent spray-foam performance, and separate HVAC zones between workshop and residence to control dust and odor.

    Drill into structural and systems choices: determine whether a clear-span steel frame or post-and-beam will suit a 30-60 ft shop bay, size mezzanines for 200-500 lb/ft2 live loads if used, and ask an engineer to spec wind and snow loads per local code (e.g., 90 mph winds or 30-50 psf snow loads in many regions). You should also plan mechanicals-estimate 20-35 BTU/sq ft for heating load sizing depending on climate-specify acoustical separation and locked entry between shop and living, and use examples from similar builds (a 2,400 sq ft barndo with 1,000 sq ft shop often allocates 35-45% of budget to finishes and MEP systems).

    Securing Financing

    You should line up financing before finalizing permits and contracts: construction loans typically require 20-25% down and carry rates about 0.5-1.5% higher than comparable mortgages. Expect lender underwriting to take 2-6 weeks and require a fixed-price contract, detailed budget, and builder approval. For a $250,000 build you’ll likely need $50k-$62.5k down plus reserves; interest-only payments during construction convert to a permanent mortgage when the project is complete.

    Budgeting for Construction

    Itemize land, site work, foundation, shell, utilities, interiors, and permits-use quotes from at least three contractors. Plan typical ranges: site prep $5k-$50k, foundation $10k-$40k, shell $25k-$60k, finishes $30k-$80k depending on quality. Set a contingency of 10-15% and track all bids in a spreadsheet to compare scope, exclusions, and change-order policies.

    Exploring Loan Options

    Compare construction-to-permanent (single-close), standalone construction, HELOCs, and cash-out/portfolio loans; construction-to-perm is popular for new barndominiums because it converts without a second closing. Lenders usually expect a 680+ credit score, DTI under ~45%, and detailed draw schedules tied to inspections.

    Construction-to-permanent loans typically disburse funds in draws based on completion milestones-common draw breakdowns are foundation 20%, framing/envelope 30%, rough trades 30%, finishes 20%. You’ll pay interest only on amounts drawn; after final inspection the loan converts to a conventional mortgage. Lenders require a signed fixed-price contract, builder’s resume/insurance, line-item budget, and often 6 months of reserves. If your build is $200,000, plan for 4-6 draws, a 20% down payment ($40,000), and interim inspections that can add $500-$1,500 in fees to the closing costs.

    Construction Process

    During construction you juggle sequencing, inspections, and contractor coordination to turn plans into a finished home: expect 1-3 weeks for site prep, 2-4 weeks to complete foundations and erect the shell, then 8-16 weeks of mechanical, insulation, and finish work depending on scope-most builds land between 4-9 months. Schedule buffer time for utility tie-ins and two to four key inspections that can pause progress if issues arise.

    Foundation and Framing

    For foundations you’ll select slab-on-grade, pier, or shallow footing systems based on soil reports and frost considerations; footings, rebar, pour, and initial cure typically take 3-7 days with a 28-day concrete cure for full strength. Framing with post-frame trusses and metal sheathing can raise the shell in 7-14 days for a 2,000-3,000 sq ft plan, while precise squaring, anchor bolt layout, and an early framing inspection prevent costly rework.

    Exterior and Interior Finishing

    Exterior work often begins with metal panels and roofing while you order windows and exterior doors to match lead times; insulation choices range from fiberglass batt (R-13-R-21 walls) to closed-cell spray foam, and attic targets are typically R-30-R-49. Inside, you’ll sequence HVAC rough-in, plumbing and electrical, then drywall, trim, and flooring-expect 4-12 weeks for finish phases depending on custom cabinetry and appliance lead times.

    In practice you should install roofing and weather barrier before interior finishes to protect work. Choosing spray foam versus batts affects installation speed and airtightness-spray foam costs roughly 2-3× more than batts but simplifies sealing and reduces cold bridging in metal frames. Plan mechanical rough-ins and inspections before drywall; drywall taping plus paint for a typical 2,400 sq ft interior takes 7-14 days, while flooring choices like polished concrete or engineered wood change final touch timelines and cost.

    Utilities and Amenities

    Bring utilities online in logical sequence: trench for water and sewer before slab work, set the 200-amp electrical service and meter pad early, and coordinate gas and broadband conduits to avoid rework. You should decide between municipal sewer, septic, or a well based on lot tests; for a 3-bedroom layout a conventional septic system often requires a 1,000-1,500 sq ft drain field. Plan dedicated lines for high-load equipment like ovens, EV chargers, and workshop tools to prevent costly panel upgrades later.

    Installing Electrical and Plumbing

    Start electrical by sizing service-200 amps is common-and locating the main panel near future living zones; include AFCI/GFCI protection and 20A kitchen circuits. For plumbing, run a 3/4″ main with 1/2″ branch lines or use a PEX manifold for simplified shutoffs. Coordinate rough-in locations with cabinet and appliance layouts, and book inspections after rough framing: many builders schedule electrical and plumbing rough inspections together to keep a 4-9 month timeline on track.

    Heating, Cooling, and Insulation

    Choose systems that match the metal-frame envelope: mini-split heat pumps (9k-36k BTU heads) are efficient for open plans, while central HVAC may suit multi-zone designs; aim for wall R-values between R-13 and R-21 and attic R-38 to R-60 depending on climate. You should include a thermal break between metal siding and interior framing and consider closed-cell spray foam (≈6-7 R per inch) at eaves to control condensation and air leakage.

    Run a Manual J load calculation before purchase: a 1,800-2,200 sq ft barndo often needs 18k-36k BTU total heating/cooling capacity depending on insulation and glazing. Also factor in ventilation-an ERV/HRV can manage humidity and bring fresh air without major energy loss-and size ductwork to keep static pressure low; sealing ducts to under 5% leakage and using MERV 13 filters improves efficiency and indoor air quality.

    Landscaping and Outdoor Spaces

    Integrate grading, drainage and topsoil placement into your timeline: grade 2-4% away from the slab, spread 4-6 inches of screened topsoil, and stage planting after final irrigation is installed. You can allocate 30-50% native plantings to cut maintenance and water use; install 1-2″ mulch beds, and plan hardscape thresholds so patios and walkways tie directly to door elevations for seamless transitions.

    Enhancing Curb Appeal

    Frame your barndominium with a defined driveway and entry: choose crushed stone for a rural look at roughly $0.50-$1.50 per sq ft or concrete/pavers for a cleaner edge; add two low-voltage path lights per 25-30 feet, place one or two 15-25 ft canopy trees at least 20 ft from the building, and use symmetrical foundation plantings 3-4 ft high to balance the metal façade.

    Functional Outdoor Areas

    Design outdoor living to match how you’ll use it: allocate a 12’x12′ (144 sq ft) dining patio or 16’x20′ (320 sq ft) multi-use patio for seating and cook stations, place a 10-15 ft service clearance behind outdoor kitchens, and confirm setback and septic-clearance rules before siting decks, sheds or detached garages to avoid rework.

    Specify materials and technology for longevity: slope hardscapes 1/4″ per foot away from the house, use permeable pavers or gravel in high-drainage zones, run a dedicated 20-amp GFCI circuit for an outdoor kitchen, and locate fire features at least 10 ft from structures; these choices cut maintenance and meet most local inspections.

    Final Words

    Summing up, you can transform a blueprint into a functional barndominium by following methodical planning, smart material choices, and clear communication with contractors; your active involvement from site prep through framing to finishes keeps the project on schedule, within budget, and true to your design goals.

    FAQ

    Q: What are the major phases from blueprint to a finished barndominium?

    A: The process typically follows these phases: design and engineering (site survey, floorplan, structural drawings), permitting and utilities (permit applications, utility hookups, septic or sewer design), site preparation and foundation (grading, soil compaction, footings or slab work), shell construction (post-frame or steel frame erection, roof and wall panels), rough-ins (electrical, plumbing, HVAC installed and inspected), insulation and interior framing (insulation strategy, interior walls, vapor management), finishes and trim (drywall, flooring, cabinetry, fixtures), final inspections and punch list, and exterior grading/landscaping. Each phase can overlap; plan lead times for engineered drawings, permit processing, and material deliveries to avoid downtime.

    Q: How do I choose between a steel-framed barndominium and a post-frame (pole) system?

    A: Steel-framed systems offer high strength, long spans, and resistance to rot and pests; they can simplify rapid enclosure and allow open interior layouts. Post-frame (timber poles) tends to be less expensive for certain spans, integrates well with conventional wood framing interiors, and can be easier to modify on site. Consider local climate, desired interior layout, insulation strategy (thermal bridging is greater with steel), available contractors with experience in each system, and long-term maintenance. Obtain cost comparisons for the exact design and factor in foundation differences and connection details for the chosen system.

    Q: What foundation types are best for barndominiums and how should the site be prepared?

    A: Common options are slab-on-grade with thickened edges and frost footings, stem wall foundations with slab infill, and pier foundations for raised floors. Site prep requires soil testing to identify bearing capacity and drainage characteristics, clearing, cut/fill and compaction, and establishing proper drainage away from the building. Frost considerations determine footing depth in cold climates. Coordinate foundation design with structural engineer and local code requirements, and include sub-slab utilities and vapor barrier planning before pouring.

    Q: Which insulation and moisture-control methods work well for metal-sided barndominiums?

    A: Closed-cell spray foam at the roof and wall cavities provides high R-value, air sealing, and moisture control but is costlier. Open-cell spray foam offers air sealing but needs a vapor management strategy in cold climates. Fiberglass batts or rigid board with an interior vapor retarder combined with a thermal break can be economical if installed correctly and if condensation risk from metal panels is mitigated. Ensure continuous roof insulation or a well-ventilated roof assembly to prevent moisture buildup. Include ventilation, proper flashing, and a drainage plane behind exterior panels to control water infiltration.

    Q: What are typical timelines, major cost drivers, and how can I manage budget overruns?

    A: A straightforward barndominium shell can be erected in a few weeks; a complete finished build commonly runs 6-12 months depending on complexity, permit delays, and subcontractor scheduling. Major cost drivers are site work (grading, utilities, septic), foundation type, shell material and thickness, insulation and HVAC design, interior finishes (flooring, cabinetry, fixtures), and specialty systems (solar, radiant heat). To manage budget: get multiple bids, set a contingency (10-20%), lock in material selections early, phase work if needed, monitor change orders closely, and hire a project manager or general contractor experienced with barndominium builds to coordinate trades and inspections.