Many DIYers like you can transform a barndominium’s raw shell into stunning, livable rooms by combining efficient layouts, layered lighting, durable materials, and personalized finishes; this guide outlines practical techniques for planning zones, maximizing storage, tackling finishes, and adding character so you can create comfortable, stylish spaces that reflect your lifestyle and budget.
Key Takeaways:
- Embrace the open-plan layout and create distinct zones with area rugs, furniture placement, sliding barn doors, or half-walls to keep the airy barn feel while defining rooms.
- Mix raw, rustic materials (reclaimed wood, exposed beams, metal accents) with sleek modern finishes and statement lighting to balance warmth and contemporary style.
- Use budget-friendly DIY solutions and multifunctional pieces-built-ins, upcycled furniture, modular storage-and layer lighting and textiles to achieve a personalized, high-impact interior.
Understanding Barndominium Design
In practice, designing a barndominium blends industrial shell efficiency with residential comfort: you’ll often work around a steel or post‑frame shell, 30-60′ bays, and open interiors that favor 10-14 ft ceilings. Many plans are 1,200-3,000 sq ft; finish level drives costs-roughly $80-$150/ft²-while insulated metal panels and spray foam can cut heating loads significantly. Plan zoning, storage, and utilities early so your open layout functions like distinct rooms.
What is a Barndominium?
A barndominium is a hybrid barn-home where living quarters occupy a metal or timber post-frame building; you get an expansive open plan often paired with an attached shop, garage, or studio. Typical builds combine 40×60 or 30×40 bays, and you can outfit raw shells with drywall, reclaimed wood, or exposed trusses to achieve farmhouse, modern, or industrial styles.
Benefits of Barndominium Living
You gain affordability, flexibility, and durability: barndominiums commonly finish faster (3-6 months), cost less per square foot than custom stick‑built homes, and feature long‑lasting metal roofs (40-70 years). Energy efficiency improves with spray foam insulation and insulated metal panels, while the open plan makes it easy to adapt spaces for guests, workshops, or rental suites.
For example, you can design a 1,800 sq ft barndo with a two‑bay workshop and separate ADU for rental income, boosting ROI; closed‑cell spray foam at about R‑6-7 per inch tightens the envelope, and proper roof overhangs plus passive solar orientation reduce HVAC loads. Maintenance falls lower too-metal siding resists rot-and mechanicals are simpler to service in open cavities.
Choosing a Color Palette
Pick a palette that ties your steel, concrete and wood elements into a cohesive whole by using the 60-30-10 rule: 60% dominant neutral, 30% secondary tone, 10% accent. You should match neutrals to your flooring LRV and choose lighting around 2700-3000K for warm paint perception. Test swatches on north- and south-facing walls, and note how metal finishes-black powder coat vs. galvanized-shift perceived color before committing.
Neutral Tones for Versatility
You can rely on greige, warm taupe or soft gray as a base to make zones flow and brighten an open plan; aim for mid-tone neutrals with LRVs around 30-60 to avoid washout. Pair those walls with raw wood (oak at 10-12% warm undertone) and black or bronze hardware for contrast, then layer texture-wool rugs, linen curtains-to prevent a flat look while keeping flexibility for future color swaps.
Bold Colors for Accent
You should use bold hues sparingly-on a feature wall, kitchen island, or entry door-keeping them to roughly 10% of visible surfaces per the 60-30-10 rule. Try barn-red, deep navy, or teal to echo exterior siding or vintage signage; these choices add depth without overwhelming the volume of an open barndominium.
When dialing in accent colors, test 12″x12″ swatches at eye level and view them at morning and evening light to check undertones. Choose finishes strategically: satin for cabinets, eggshell for walls, semi-gloss for trim and doors. Also, consider complementary materials-deep navy pairs well with walnut and brass, while mustard or ochre livens pale oak and matte black fixtures-so your accents read intentional and integrated.
Flooring Options
Because your barndominium blends industrial shell and home comfort, match flooring to function: sealed or polished concrete for workshop entries, LVP with a 12-20 mil wear layer for moisture-prone living areas, and engineered or reclaimed oak (7-9″ planks) for bedrooms. Factor in subfloor insulation, a vapor barrier under slab-on-grade, and typical concrete specs of 3,000-4,000 psi when planning finishes and long-term performance.
Durable Flooring Choices
Choose commercial-grade vinyl plank (20 mil wear layer) for garage-to-home transitions, porcelain tile (water absorption <0.5%, PEI 4-5) for mudrooms, and sealed/polished concrete (3,000+ psi) or epoxy coatings for work zones. These resist abrasion, chemicals, and heavy loads; epoxy systems often last 10-20 years with proper prep, while well-sealed concrete floors can exceed 30 years before major refurbishment.
Aesthetic Appeal
For visual impact, pair 7″-9″ wide engineered or reclaimed oak for a rustic-modern vibe, or install large-format porcelain with narrow grout joints for a sleek industrial look. You can stain concrete from warm taupe to charcoal, add inlaid metal strips, or lay herringbone and chevron patterns to create focal areas that soften the building’s raw edges.
Also consider performance with radiant floor heating-tile and concrete conduct heat best, while engineered hardwood tolerates moderate radiant temps; check manufacturer limits (some LVP allows surface temps up to 85°F/29°C). Coordinate finishes with your metal accents and cabinetry using a 2-3 color palette, vary plank widths for scale, and plan transitions plus underlayment to control sound in your open-plan spaces.
Open Concept Layouts
With vaulted ceilings often between 12-16 feet and footprints from 1,200-2,500 sq ft, you can make an open-plan barndominium feel intentional by zoning rather than enclosing. Place the kitchen as the central hub, anchor seating with a 5×8 or 8×10 rug, and align lighting runs over an 8-foot island to define function. Use consistent flooring-wide-plank hardwood or polished concrete-to preserve sightlines and boost perceived space.
Maximizing Space
You gain usable square footage by choosing built-ins, multiuse furniture, and clear circulation: aim for 36-42 inch walkways and a 42-48 inch-deep island with seating to avoid bottlenecks. Install 12-18 inch-deep floating shelves, under-stair drawers, and a lofted mezzanine for a 100-300 sq ft bonus area. In smaller barndominiums, switchable Murphy beds and nesting tables preserve openness while adding function.
Creating Flow Between Rooms
You preserve flow by aligning primary sightlines and circulation along the building’s long axis and keeping transition widths at least 36 inches; use 6-8 foot sliding barn doors or 42-inch half-walls to allow visual connection while providing acoustic separation. Coordinate material palette-same trim, flooring color, and 2700-3000K lighting-to make movement between zones feel seamless.
For deeper impact, use layered lighting and consistent horizontal lines to guide the eye: a 3-foot-wide runner, staggered pendant spacing of 24-30 inches, and area rugs that overlap thresholds by 6-12 inches. You can also angle furniture to create natural pathways, place a console table at a 36-inch clearance to funnel traffic, and employ glass transoms or clerestory windows to maintain daylight continuity while defining separate functions.
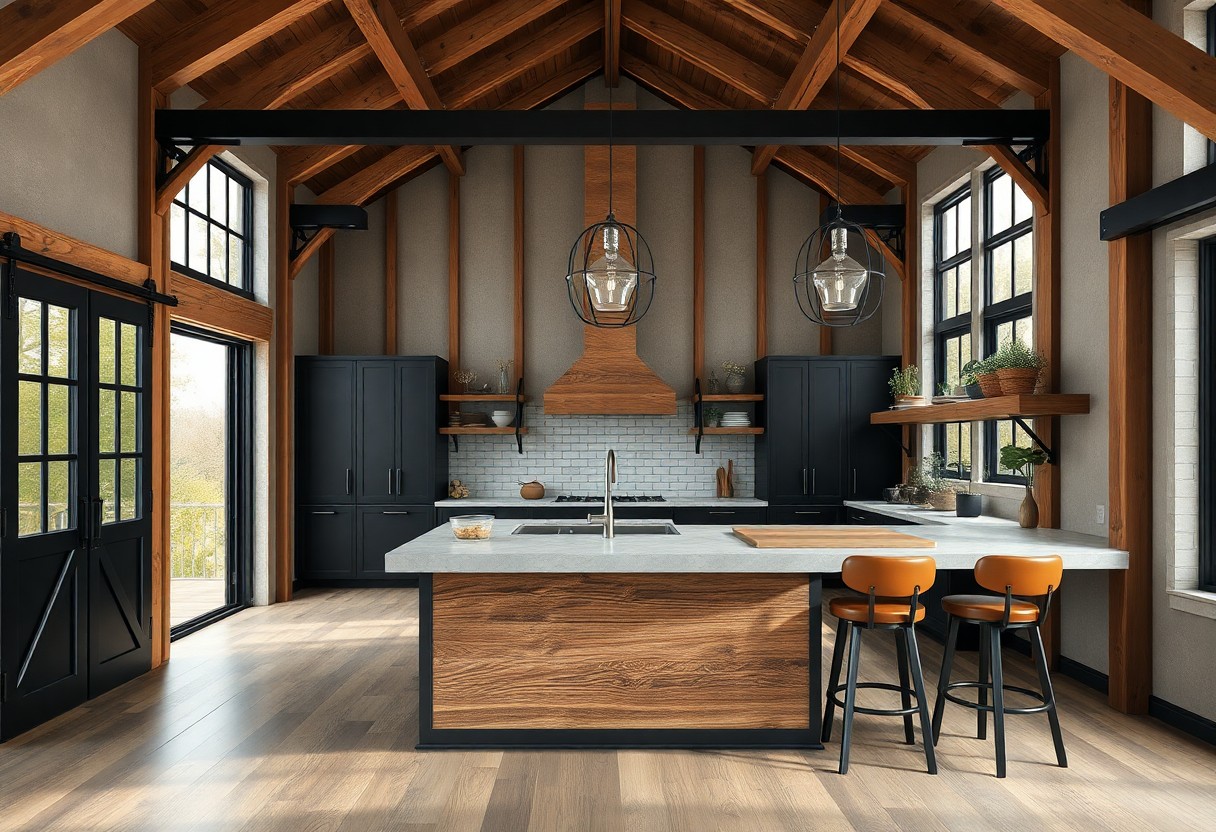
Kitchen Inspiration
Turn your kitchen into a functional showpiece by pairing a 7×4 ft island with 36″ counter-height seating for three, 3cm quartz countertops, and a 30-36″ professional range. You can preserve flow in an open-plan barndominium by keeping the work triangle (sink, stove, fridge) between 12-26 feet total and using a low-profile bench or pendant grouping to anchor the dining area. Use warm metals and reclaimed wood to balance industrial beams with a refined finish.
Modern Fixtures and Finishes
Choose matte black or brushed brass faucets, 3cm quartz or honed granite countertops, and 3000K LED undercabinet strips at roughly 300 lumens/ft for effective task lighting. You can install a 33-36″ farmhouse or undermount sink and pair it with a 30-36″ stainless hood to match pro-style ranges. Coordinate hardware in 2-3 finishes to keep the palette intentional while highlighting rustic elements.
Functional Design Elements
Optimize your layout with 24″ deep base cabinets, 18-21″ deep drawers for pots, and a 30-36″ pantry walkway to ease traffic. You should place the dishwasher within 24″ of the sink and allow 42-48″ of circulation around islands for comfortable entertaining. Add pull-out spice racks, vertical tray dividers, and a dedicated baking drawer to free countertop space and speed up meal prep.
In a recent 1,800 sq ft barndominium remodel you can replicate, the designers used a 7’×4′ island with nine deep drawers, a 36″ dual-fuel range, and a 6′ walk-in pantry with adjustable shelving every 3″ to maximize storage; overhead pot racks and toe-kick drawers increased usable space by about 20%. Consider integrated charging drawers, pull-out trash/compost bins, and tile laid on a diagonal to visually widen aisles while keeping everything within reach.
Living Room Ideas
Cozy and Inviting Spaces
Anchor your living room with an 84″ sofa and an 8×10 rug to create a clear seating zone; add a 36-48″ coffee table and two 22-26″ side tables for balance. Layer lighting with 3000K recessed LEDs for ambient light, a 12-14″ pendant over the coffee table, and a floor lamp providing 1,200-1,600 lumens for reading. Use 4-6 mixed-texture throw pillows and a 60-80″ bench near the entry to make the space feel lived-in and welcoming.
Incorporating Rustic Elements
Mix reclaimed wood accents-8-10″ wide ceiling beams or a 6-8″ shiplap accent wall-with matte-black hardware and industrial lighting to get an authentic barndominium look. You can install a 36″ sliding barn door for room separation, add wrought-iron sconces spaced 6-8 ft apart, and choose distressed oak or pine planks in 6-8″ widths to ground the room visually without overwhelming the open plan.
You should balance rustic textures with smooth surfaces: pair a reclaimed-wood mantel (4-6 ft) with a 48″ gas or electric fireplace, and contrast a rough plank wall with polished concrete or sealed 3/4″ hardwood floors. For DIY economy, source 100-200 sq ft of salvaged barn wood for an accent wall, prefinish boards with a clear matte polyurethane, and use hidden fasteners or Simpson straps where visible connections are needed for a clean, professional finish.
Conclusion
From above, you can apply practical design strategies-mixing reclaimed materials with clean fixtures, maximizing light and storage, and tailoring layouts to your lifestyle-to create cohesive, stylish barndominium interiors; by prioritizing durable finishes, layered lighting, and thoughtful zoning, you ensure each room is both beautiful and functional, reflecting your tastes while optimizing comfort and long-term value.
FAQ
Q: How can I blend rustic and modern elements in a barndominium interior?
A: Start by establishing a balanced palette: warm, natural woods and matte blacks or charcoal grays for a modern edge, with neutral walls to keep the space light. Retain structural features-exposed trusses, steel posts, or reclaimed wood beams-and pair them with streamlined furniture (clean lines, low profiles) to avoid visual clutter. Mix materials selectively: a metal-framed sofa with leather upholstery, a live-edge wood dining table with minimalist metal legs, or concrete countertops softened by wood shelving. Use modern lighting (linear pendants, recessed cans) to highlight rustic focal points like a stone fireplace or reclaimed-wood accent wall. Anchor rooms with area rugs and textiles that introduce texture and warmth-wool, linen, woven jute-while keeping patterns subdued. Keep finishes cohesive by repeating two or three materials/tones throughout the home so transitions feel intentional, and choose hardware and fixtures in consistent metals (black, oil-rubbed bronze, or brushed nickel).
Q: What are high-impact, budget-friendly DIY upgrades for barndominium rooms?
A: High-impact, low-cost projects include: 1) Accent walls using reclaimed wood or tongue-and-groove boards-cut, sand, and finish with Danish oil or stain for a custom look; 2) Painting cabinets and swapping hardware for kitchens and bathrooms-use a durable bonding primer and satin or semi-gloss paint; 3) Installing open shelving with metal brackets and stained wood planks for both storage and display; 4) Building a sliding barn door from plywood or reclaimed boards and a simple track kit to save space and add character; 5) Updating lighting with energy-efficient LED fixtures and layered lighting (ambient, task, accent) to transform mood; 6) Creating built-in seating with storage (window bench or dining banquette) from plywood and paint; 7) Laying affordable vinyl plank flooring that mimics wood for durability and easy upkeep. For each project, plan measurements, buy quality fasteners/adhesives, and test finishes on scraps. Typical budgets: accent wall $50-$300, cabinet refresh $100-$600, barn door $150-$400, shelving $30-$200 depending on materials.
Q: How do I design flexible, multifunctional rooms in an open barndominium layout?
A: Begin by mapping primary functions (sleeping, cooking, working, entertaining) and traffic flow. Define zones with furniture placement-sofas and shelving that act as visual dividers, rugs to delineate seating areas, and back-to-back counters for kitchen vs. living separation. Use movable elements: rolling islands, folding tables, and lightweight screens to reconfigure space quickly. Integrate vertical storage and built-ins to keep clutter controlled and maintain openness. Employ layered lighting: zone-specific fixtures plus dimmers to adapt ambiance. For acoustic control, add soft surfaces-ceilings baffles, heavy curtains, rugs-to reduce echo in high ceilings. Plan utilities early: locate plumbing and large appliances where future layout changes are feasible, and design HVAC with zoning in mind. For privacy, incorporate sliding doors, pocket walls, or lofted partitions while preserving sightlines. Create clear circulation paths (minimum 36-42 inches where possible) and test layouts with cardboard templates or painter’s tape on the floor before committing.
Leave a Reply