Category: Barndominium Building 🔨

  • Best Barndominium Kit Companies – Top Picks for Your Build

    Most homeowners and builders find that choosing the right barndominium kit saves time and money; this guide helps you compare leading manufacturers by price, materials, customization, warranty, and support so you can select the best fit for your site, budget, and design preferences. You’ll get clear pros and cons, delivery and installation considerations, and tips for vetting suppliers to ensure your build meets code and quality expectations.

    Key Takeaways:

    • Top manufacturers offer complete, customizable kits with quality materials and pre-engineered plans to speed construction and control costs.
    • Compare pricing, warranties, lead times, shipping, and local-code support to avoid unexpected expenses and delays.
    • Choose providers with strong customer reviews, builder resources, and a network of local contractors to simplify permitting and assembly.

    Overview of Barndominiums

    What is a Barndominium?

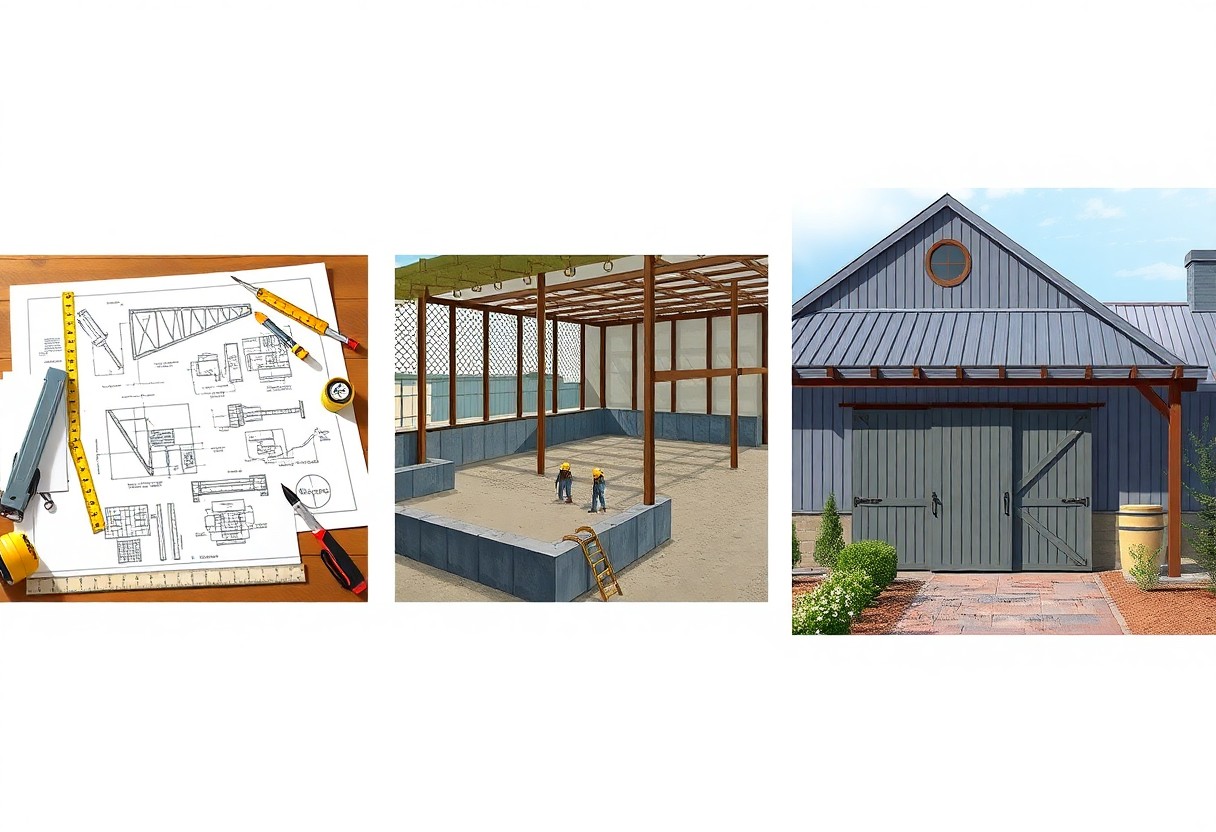
    Part barn, part condominium, a barndominium pairs a pre-engineered metal or timber building shell with residential finishes to give you open-plan living plus integrated workspace or storage. You’ll often see sizes from roughly 1,000-3,000 sq ft, with large clear spans that let you place a 1,000+ sq ft shop, garage, or workshop under the same roof as living areas. Kits and custom designs both remain common starting points.

    Benefits of Building a Barndominium

    You gain lower upfront shell costs, faster construction, and flexible floor plans that suit workshops, hobby farms, or multi-generational living. Typical savings versus comparable stick-built homes range 20-40% on shell costs, build times frequently compress to months, and steel shells offer long service lives-often 40-60 years-while reducing maintenance and allowing large, column-free interior spaces.

    For more detail, kits for the building shell commonly range $20,000-$60,000 depending on footprint and gauge, and finished build costs typically vary widely based on finishes and site work. You can tailor a 2,000 sq ft layout to include a 1,000 sq ft shop, open living plan, and loft, cutting duplication of outbuildings and often lowering total lifecycle costs through simpler maintenance and adaptable space usage.

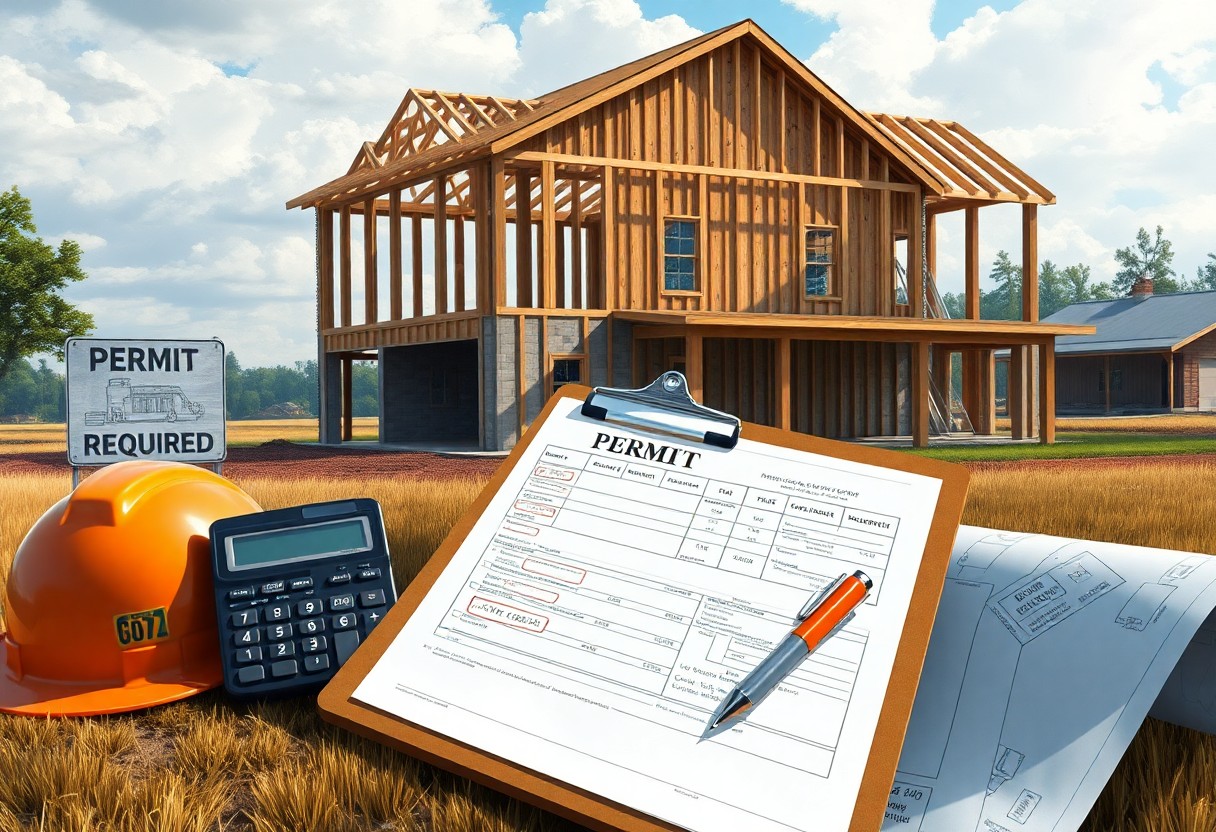
    Criteria for Choosing a Barndominium Kit Company

    Prioritize firms that score well on material standards, engineering, customization, lead time and after-sales support. You should expect PE‑stamped plans, typical lead times of 4-12 weeks, and transparent warranties (many offer 10-40 year paint or panel warranties). Compare shell-only kit costs (often $20-$60/ft²) versus finished build estimates ($100-$200/ft²), and verify delivery logistics, site-specific engineering, and customer reviews or build photos before committing.

    Quality of Materials

    Check for Galvalume or G‑90 galvanized panels, commonly 26-29 gauge for roofing/siding, and ASTM‑grade steel for structure; ask for specifications on purlins, girt thickness and fastener types. You’ll want insulation options (R‑13 to R‑30 common) and treated lumber or engineered LVLs where used. Request mill test certificates, paint warranties (20-40 years typical), and sample panels to confirm finish and corrosion resistance.

    Customization Options

    Assess how freely you can change floor plans, roof pitches, window layouts and bay sizes; many companies allow relocatable interior walls, additional garage bays, or pre‑cut door/window openings for modest fees. You should confirm if clear‑span trusses are available (often up to 60-80 ft) for uninterrupted bays, and whether the vendor provides 3D renders, option packages, and structural revisions for site conditions.

    For more detail, verify costs and timelines for specific extras: adding a mezzanine, dormers, upgraded siding, or stamped trusses typically adds 10-30% to the base kit price and can extend lead time by 2-6 weeks. Ask for example builds or case studies showing the exact scope and final cost of comparable customizations, plus any engineering change orders and associated fees so you can budget accurately.

    Top Barndominium Kit Companies

    Company A Overview

    If you prioritize structural strength and quick turnaround, Company A ships 24- or 26-gauge steel kits with engineered plans and a 6-8 week lead time for 1,200-3,000 sq ft models. Their standard package includes R-19 insulation, open-web trusses, and a 12-year structural warranty; typical turnkey estimates range $50-$75 per sq ft, though customization and site prep raise final costs.

    Company B Overview

    You’ll find Company B excels at high-end customization, offering timber-frame and hybrid steel options, 20-30 year roof warranties, and pricing from $65-$110 per sq ft for fully finished kits. They provide stamped engineering for wind and snow zones, CAD shop drawings, and a 4-6 week quote turnaround for bespoke designs up to 4,000 sq ft.

    Beyond basic specs, Company B supports multi-state permitting and has completed case studies-one 2,200 sq ft Mountain build with 50 psf snow-load engineering finished envelope-only in 10 weeks. You can order add-ons like integrated loft systems, custom cupolas, and insulated concrete slab details to streamline your contractor coordination.

    Company C Overview

    If budget and DIY appeal to you, Company C targets entry-level buyers with pre-cut post-frame kits starting around $18,000 for a 1,000 sq ft shell and 8-12 week delivery. They use 26-gauge panels, standard R-13 wall insulation options, and offer modular bay sizes (20′-40′) to simplify foundation and crane needs for smaller sites.

    Company C also provides extensive online build guides and parts-level warranties, which lets you save on labor; typical owner-builder projects using their kits report 6-12 month completion times for finished interiors. You’ll also be able to add pre-wired packages and window/door bundles to reduce subcontractor sourcing.

    Cost Considerations for Barndominium Kits

    Plan on separating kit price from build expenses: basic steel shell kits typically cost $15-$60 per sq ft, while finished barndominiums often land between $70-$150+/sq ft. For a 2,000 sq ft shell you might pay $30k-$120k; foundation, utilities, and finishes can double or triple that figure. You should request itemized quotes and compare delivered kit costs versus turnkey estimates to avoid surprises.

    Budgeting Your Build

    Break your budget into categories: kit, foundation, site prep, utilities, interior finishes, permits, and contingency. For a 2,000 sq ft project expect foundation costs of $10k-$40k, utility hookups $5k-$30k, and interior finishes averaging $40-$100+/sq ft. You should set a contingency of 10-20% and get multiple bids for each major trade.

    Hidden Costs to Consider

    Account for hidden line items like soil tests ($500-$2,000), crane or delivery fees ($1,000-$5,000), septic hookups ($5k-$20k), upgraded footings for frost or expansive soils, HVAC upsizing and permit or impact fees. You should ask kit sellers what they exclude so you can budget accurately.

    In one build, a homeowner bought a $45k kit for 1,800 sq ft but paid $28k for slab reinforcement due to clay soils, $9k for septic, $6k to extend power, and $15k for insulation and finishes-add-ons exceeded the kit cost. To limit exposure you should get a site evaluation, line-item quotes from the supplier, and at least two foundation bids.

    Customer Reviews and Testimonials

    Customer feedback across review sites highlights repeatable patterns you can use when vetting kits: many buyers give average ratings between 4.2-4.8/5, cite rapid shell erection and durable 24-26 gauge steel, while service responsiveness and warranty follow-through separate top firms. You should weigh quantified praise-like multiple reports of 2-4 day shell assemblies for 2,000-2,500 sq ft kits-against the frequency of negative notes about shipping or paperwork.

    Positive Experiences

    Many owners tell you that prefab kits significantly cut framing time-Company A customers reported completing the structural shell on a 2,400 sq ft build in 3 days with two experienced crew members; customer-service response times of 24-72 hours and documented 20-year roof warranties are common selling points. You’ll also find case studies where turnkey engineering reduced permit cycles from months to weeks, saving both time and carrying costs.

    Common Challenges

    Shipping delays and missing components show up regularly in critical reviews: buyers report lead-time slips of 4-12 weeks during peak seasons and roughly 8-12% of complaints reference incomplete fastener packs or unclear installation details. You should expect some punch-list items and plan contingency time and budget-multiple reviewers noted spending an extra $1,500-$5,000 resolving parts or plan-interpretation issues.

    To mitigate these problems you can insist on written lead times and itemized packing lists, inspect deliveries within 48 hours and photograph shortages, and order 10-20% extra consumables up front. Also verify that stamped engineering matches local code before purchase, keep all communication logged for warranty claims (many require notice within 30 days), and consider hiring a local erector familiar with barndominium specifics to close punch-list items faster.

    Tips for a Successful Barndominium Build

    Sequence your build to reduce delays: order the foundation and shell to overlap, lock in a 24- or 26‑gauge steel kit with typical 8-12 week lead times, and separate kit cost from finish work (concrete slabs average $4-8/sq ft; insulation $1-3/sq ft).

    • Obtain stamped plans and permits before materials arrive
    • Secure three bids and written start dates for trades
    • Preorder long‑lead items like windows and HVAC

    Recognizing preordering key components can shave weeks off your schedule.
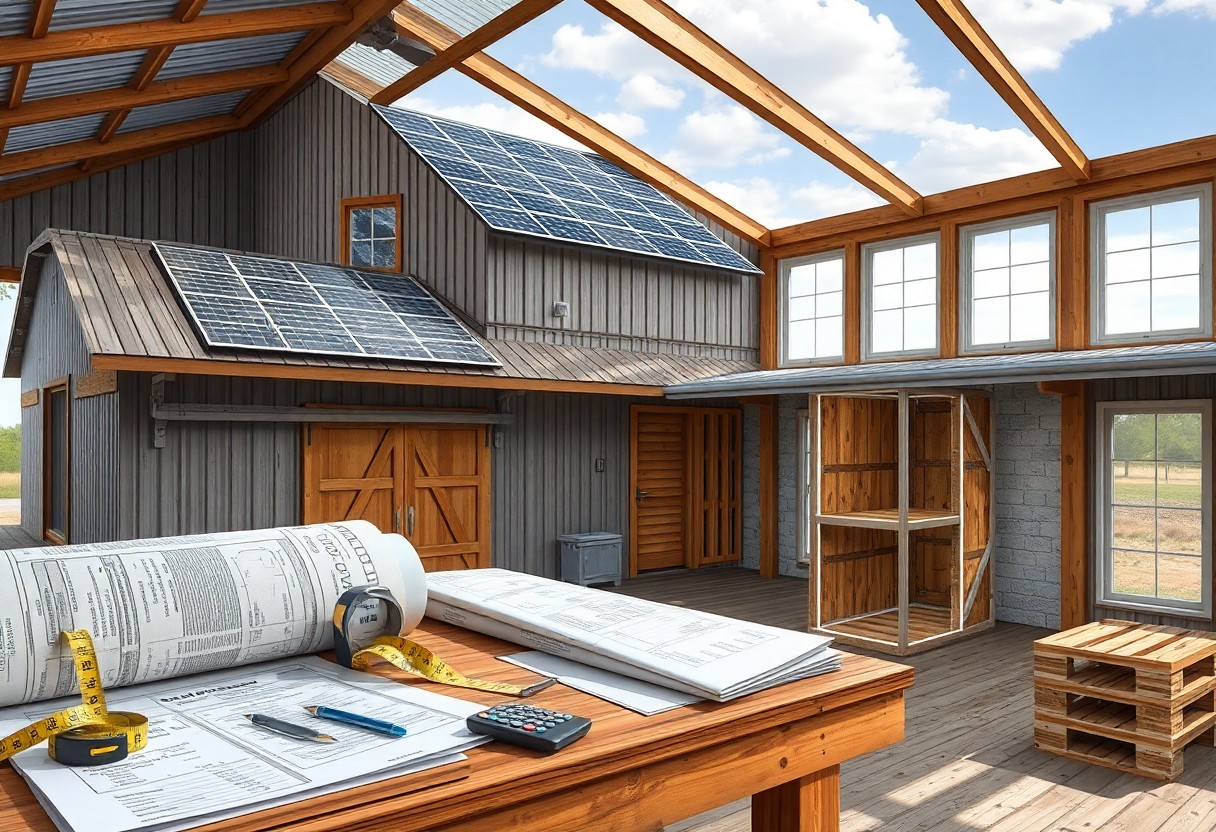
    Planning Your Space

    Start by mapping daily flows: if your shell is 2,400 sq ft, consider allocating about 1,800 sq ft to living and 600 sq ft to workshop or storage; aim for 10-14 ft ceilings in primary spaces, cluster plumbing within a 20‑ft run to save $3,000-6,000, and plan a 3-4 zone HVAC layout so you don’t oversize equipment for a 2,000-3,000 sq ft layout.

    Working with Contractors

    Require at least three written bids, verify licenses and insurance, and prefer fixed‑price or GMP contracts to limit surprise costs; expect contractor markup of roughly 10-20% above subcontractor rates, a shell erection timeline of 8-12 weeks, and total build time of 4-6 months for a typical 2,000-3,000 sq ft barndominium.

    Insist on a clear payment schedule (common draws: 10% deposit, 30% after foundation, 40% after shell, 20% at completion), written change‑order procedures with a 10‑day response window, lien waivers, and a minimum one‑year workmanship warranty; also visit at least three past projects and request a schedule of values before signing.

    FAQ

    Q: What should I consider when choosing a barndominium kit company?

    A: Evaluate company reputation, product types, and the level of engineering and support they provide. Key factors include: quality of materials (gauge of steel, treated timber, fasteners), availability of stamped structural drawings for your jurisdiction, customization options for floor plans and exterior finishes, warranty terms, delivery logistics, and on-site assembly assistance or certified erectors. Compare real customer reviews and completed projects, verify lead times and shipping costs, confirm any required foundation or concrete scope, and check whether the company offers financing or works with lenders. Ensure the company’s kit aligns with local building codes and that you have access to reliable local contractors for plumbing, electrical, insulation, and interior finishes.

    Q: Which barndominium kit companies are commonly recommended and what sets each apart?

    A: Several manufacturers are frequently recommended for different priorities: Morton Buildings – strong custom design capabilities and a nationwide dealer/installer network for turnkey projects; Legacy Building Solutions – competitive pricing on post-frame and pole barn-style kits with good customization; Armstrong Steel – heavy-gauge engineered steel buildings suited to durable steel shells; SteelMaster Buildings – bolt-together steel kits that simplify DIY erection and reduce erection time; General Steel – commercial-grade pre-engineered buildings with robust engineering documentation; American Barn Company / Homestead-style builders – options that blend traditional barn aesthetics with residential finishes. Match the company to your priorities: full-service custom design, budget-friendly kits, DIY-friendly systems, or commercial-grade engineering and warranties.

    Q: What are typical costs, timelines, and best practices for managing a barndominium kit build?

    A: Costs vary widely: basic shell kits often range from about $20,000 to $100,000+ depending on size and materials; finished barndominiums commonly fall between roughly $80-$200+ per square foot depending on finishes, systems, and labor. Timeline: ordering and fabrication typically takes 4-12 weeks, site prep and foundation can take 2-8 weeks, shell erection often completes in a few days to a few weeks, and full interior build-out can take several months. Best practices include securing stamped plans and permits before ordering, budgeting a contingency of 10-20% for change orders and unforeseen issues, coordinating the foundation contractor with the kit delivery window, hiring or consulting with an experienced general contractor familiar with metal/post-frame builds, confirming insulation and HVAC strategies early, and documenting warranty and post-delivery support terms. Factor shipping, crane or rigging costs for erection, and local utility hookups into your schedule and budget.

  • Barndominium Hidden Costs – Avoid Surprises During Construction

    With barndominium builds you must plan beyond the headline price, because site preparation, utility hookups, foundation upgrades, insulation and finishing choices, permitting delays, and contractor change orders often inflate costs; you can protect your budget by conducting thorough site surveys, getting detailed bids, verifying material and labor scopes, allocating a contingency, and closely managing change orders throughout construction.

    Key Takeaways:

    • Site preparation and foundation expenses-grading, soil remediation, septic and utility hookups often exceed initial estimates.
    • Envelope and systems costs-proper insulation, HVAC, plumbing and electrical upgrades for metal shells can add significantly to budgets.
    • Permits, change orders and delays-permit fees, design changes, inspections and contractor contingencies frequently drive up final costs.

    Understanding Barndominiums

    You need to separate structural systems, finishes, and utility work to spot hidden expenses: metal shell options (pole, steel frame) cut framing time to days, yet converting that shell into a 1,500-3,000 ft² home typically adds $50-$120 per ft² for insulation, HVAC, plumbing, and finishes-often exceeding initial shell quotes by 25-60%.

    What is a Barndominium?

    You’re looking at a hybrid building where an agricultural-style shell becomes primary living space; sizes commonly fall between 1,200 and 3,000 ft², and builds range from simple pole-barn shells to engineered steel-clear-span structures. For example, a bare 2,000 ft² shell might cost $30,000-$80,000, while full interior finishes often double that figure.

    Benefits of Barndominiums

    You gain faster construction, open-plan flexibility, and lower framing labor compared with conventional stick-built homes; typical framing savings run 10-30%. Durable metal exteriors reduce long-term maintenance, and integrated shop or storage space adds utility value that can boost resale appeal in rural markets.

    You should weigh those advantages against trade-offs: combining living and workshop space can force higher mechanical and fire-separation costs-upgrading insulation to R-30+ and installing a dedicated HVAC zone or commercial exhaust can add $5,000-$25,000. In practice, some owners save on framing but spend more on high-performance insulation, soundproofing, and custom finishes.

    Common Hidden Costs

    Beyond framing and finishes, you’ll face site-specific expenses that often push budgets up 10-30%. Grading and erosion control can add $1,000-$7,000, soil remediation $2,000-$20,000, and unexpected permit or inspection fees another $500-$2,500. You should factor in access work like driveways or culverts ($1,200-$8,000) and contingency for weather delays that increase labor and equipment rental days.

    Land Preparation Expenses

    You’ll likely pay for tree removal ($200-$2,000 per tree), stump grinding, and mass grading to achieve proper drainage; grading alone often runs $1,000-$7,000. Retaining walls or soil stabilization can add $2,000-$15,000, while required erosion-control measures and wetlands mitigation may tack on several thousand dollars and require specialized contractors and permits.

    Utilities and Infrastructure Costs

    You should budget for utility hookups: electric service can range from $1,000 to $15,000 depending on distance to the grid, well drilling typically $3,000-$15,000, and septic systems $3,000-$10,000. Road access, driveway surfacing, and culverts often add $1,200-$8,000, and municipal connection fees or impact assessments can be $500-$5,000 more.

    Trenching averages $10-$25 per foot, so a 200‑ft run at $20/ft adds $4,000; transformer or pole charges may be another $1,000-$5,000. You’ll also face permit, inspection, and inspection re‑test costs ($500-$2,000) and, for remote sites, consider off‑grid options like solar-plus-battery, which typically cost $15,000-$50,000 installed.

    Construction Costs Beyond the Basics

    Expect line items that don’t appear on initial bids: engineered trusses, third‑party inspections, crane rentals, and mobilization fees can push your budget 10-30% higher; for example, crane setup for roof lifts often costs $1,200-$4,000 and special inspections or engineering reports typically run $800-$4,000 depending on complexity.

    Specialized Contractors

    You’ll pay premiums for trades with specific barndominium experience: welders for custom metal framing may bill $75-$120/hr, HVAC contractors for ductless heat pumps $8,000-$20,000 installed, and septic installers $3,000-$10,000; remote sites add mobilization fees of $500-$3,000 and change orders from specialty subs compound quickly.

    Material Upgrades and Customizations

    Upgrading materials can shift costs dramatically-moving from basic ribbed metal siding ($3-$5/sq ft) to insulated standing‑seam ($8-$12/sq ft) or choosing spray foam over fiberglass can add 10-40% to your material budget and affect installation timeframes.

    Specific examples show the impact: triple‑pane windows run $600-$1,200 each vs. vinyl at $200-$400, custom cabinets often start at $12,000 compared to $5,000 for stock, and polished concrete floors typically cost $3-$8/sq ft while hardwood is $6-$12/sq ft-small selections scale across a 2,000 sq ft build and can add tens of thousands to the final price.

    Financing and Insurance Considerations

    Loan Options for Barndominiums

    Construction-to-perm loans are the most common route, often requiring 20-25% down with interest-only draws during a 6-12 month build before converting to a 15-30 year mortgage. Conventional lenders may classify a barndominium as residential or agricultural-classification affects rates and documentation. USDA and VA loans can work in rural areas if the structure meets primary-residence rules, while appraisers frequently rely on a cost approach when comparable sales are scarce, so provide detailed plans, budgets, and builder contracts to your lender.

    Insurance Coverage for Unique Structures

    During construction you’ll need builder’s risk insurance to cover materials and losses; after completion standard homeowner policies sometimes exclude nontraditional shells, so expect endorsements for metal roofing, detached shops, or open-floor agricultural elements. Insurers will assess wind/hail exposure, replacement-cost estimates, and occupancy use-premiums can be higher if the home is classified nonresidential-so confirm lender-required hazard and, if applicable, flood insurance early to avoid coverage gaps at closing.

    Builder’s risk premiums typically run about 1-3% of project value annually, and replacement-cost estimates for finished barndominiums often range $100-$200 per sq ft depending on finishes, which directly affects insured value. You should shop specialty carriers familiar with post-frame or steel-paneled homes, secure a certificate of insurance from your contractor, document progress with photos and receipts for faster claims, and verify whether endorsements for wind, hail, or detached workshops are included or must be added separately.

    Permitting and Regulatory Fees

    Expect permitting and regulatory fees to add $1,000-$10,000 to your barndominium budget, or roughly 0.5-3% of total construction costs depending on location. Building permits, plan review, impact fees, utility hookup charges, and inspections are typical line items. In many counties your permit total rises if valuation‑based fees apply (commonly 0.5-2% of declared project value) or if special permits are needed for wetlands, driveways, or accessory dwelling classifications.

    Zoning Requirements

    Zoning can force design changes or extra steps: you may need a variance, conditional use permit, or rezoning if agricultural-to-residential rules conflict. Application fees commonly run $500-$3,000 and public hearings can extend processing 4-12 weeks; rural jurisdictions sometimes take longer. If your lot sits in an agricultural zone expect setbacks, septic density limits, or HOA covenants to require plan revisions that bump costs and schedule.

    Permit Costs

    Permit costs cover building permits, plan review, and trade permits (electrical, plumbing, mechanical). Typical ranges: building permits $200-$5,000, trade permits $50-$500 each, septic and well permits $300-$2,000, and impact or school fees $1,000-$5,000 in some jurisdictions. Inspection fees and re‑inspection charges can add several hundred dollars if changes are made after approval, so tally each category when estimating.

    Many jurisdictions calculate permit fees from your declared construction valuation at rates between about 0.5% and 2%-so a $250,000 build could mean $1,250-$5,000 in base fees. Plan review can take 2-8 weeks and may cost 25-50% of the building permit; resubmissions often incur extra charges. You should request a written fee schedule from the local building department, budget a 10-15% permitting contingency, and factor time delays into your financing hold costs.

    Budgeting for Future Maintenance

    Plan on allocating 1-3% of your barndominium’s replacement cost annually for routine upkeep and small repairs; on a $300,000 build that’s roughly $3,000-$9,000 per year. Factor in predictable line items like annual HVAC servicing ($100-$300), gutter cleaning ($100-$250), and periodic exterior resealing so your long‑term budget isn’t derailed by predictable lifecycle costs.

    Long-term Care Costs

    Expect major component replacements on timelines: metal roof recoating or panel replacement every 8-15 years ($1,500-$6,000), HVAC replacement at 15-20 years ($5,000-$10,000), and septic pump‑outs every 3-5 years ($300-$700). You should also budget for slab settlement or foundation repair ($500-$4,000) and occasional siding or insulation repairs specific to metal‑frame assemblies.

    Emergency Fund Planning

    Allocate a dedicated emergency fund for unexpected structural or systems failures-aim for 3-6 months of household expenses plus a repair reserve equal to 1-3% of the building value (e.g., $3,000-$9,000 on a $300K barndo). Keep these funds liquid in a high‑yield savings account so you can pay for urgent deliveries, contractor emergency calls, or immediate parts replacements without borrowing.

    Use an annualized approach to size your monthly savings: divide major replacement costs by their expected lifespans and add routine expenses. For example, roof recoating $3,200/10 years = $320/yr; HVAC $7,000/18 years = $389/yr; septic $500/4 years = $125/yr; total ≈ $834/yr, or about $70/month. Allocate that monthly amount to a labeled account and top it up after any large claim or major repair.

    To wrap up

    To wrap up, you should budget for hidden barndominium costs like site prep, utility hookups, unexpected structural upgrades, and upgraded finishes; secure detailed contracts, contingency funds (10-20%), and trusted contractors, and conduct regular inspections so you can catch scope changes early and keep your project on schedule and within budget.

    FAQ

    Q: What are the most common hidden costs that show up during barndominium construction?

    A: Unexpected site conditions (rock, poor soil, high water table, or required drainage corrections) frequently drive up foundation and grading costs; extended excavation, rock removal, or engineered footings may be needed. Utility connections and off-site fees – water, sewer or septic design and permits, electrical service upgrades, transformer or trenching costs, and long service runs – add surprise charges. Changes to plans or upgrades to finishes (better insulation, upgraded windows, higher-end cabinetry, or specialty HVAC) quickly exceed builder allowances. Delivery and equipment charges – oversized material shipping, crane rental, and hard-to-reach-site premiums – are often omitted from initial estimates. Inspection fees, specialized testing (geotechnical, septic perc tests), impact fees, and municipal requirements can create extra line items. Weather delays and labor shortages increase schedule-dependent costs like temporary power, site security, and extended subcontractor mobilization. Finally, waste disposal, dumpster service, staging or storage for materials, and final cleanup or landscaping are frequently underestimated.

    Q: How should I budget for unknowns and control change-order costs?

    A: Set a contingency fund (typically 10-20% of the construction budget based on site risk) and treat allowances as placeholders, not firm numbers. Require the contract to detail allowances and the process for approving upgrades so you see cost impacts before work begins. Lock major selections (HVAC type, insulation R-value, window performance, roofing, and floor systems) early to avoid mid-build change orders. Insist on a formal written change-order procedure that includes scope, cost, time impact, and signed authorization before work proceeds; cap contractor markup percentages for changes. Obtain a geotechnical report and utility feasibility early to reduce surprises. Use fixed-price bids for defined scopes when possible or include maximum guaranteed price clauses. Keep detailed records of decisions and approvals and require lien waivers from subcontractors at payment milestones to reduce financial exposure.

    Q: What contract terms and protections should I include to avoid surprise invoices and disputes?

    A: Use a clear, itemized scope of work and include references to plans, specifications, and allowances; require the builder to disclose subcontractor quotes and permit fees prior to signing. Specify payment schedules tied to completed milestones, include a reasonable retainage percentage, and condition final payment on receipt of lien waivers and passing final inspections. Require the builder to provide certificates of insurance, builder’s risk insurance during construction, and worker’s compensation coverage. Include a documented change-order process with written approvals and defined markup limits for labor and materials. Add clauses for handling unforeseen site conditions (who pays for geotech-recommended corrections), dispute resolution (mediation/arbitration), and a completion/punch-list timeline. Include warranty terms, maintenance requirements, and an itemized list of buyer-supplied items to prevent scope gaps that lead to extra charges.

  • “From Blueprint To Reality – A Step-by-Step Look At Barndominium Construction”

    With a solid blueprint and realistic timeline, you can navigate barndominium construction from foundation to finished living space with confidence; this guide walks you through site preparation, metal shell erection, insulation and systems installation, interior framing and finishes, and final inspections so you understand each phase, make informed decisions about materials and contractors, control costs and schedule, and ensure your build meets functional and code requirements.

    Key Takeaways:

    • Thorough planning and accurate blueprints set the scope: site selection, permits, and utility planning prevent delays and change orders.
    • Follow a clear construction sequence-foundation, metal shell erection, interior framing, systems, and finishes-to keep the project on schedule and control costs.
    • Budget and finish strategy matter: insulated shell, HVAC choices, and contractor selection determine long-term performance, timeline, and overall cost.

    Understanding Barndominiums

    You’ll see barndominiums marry a metal or post-frame agricultural shell with full residential interiors, typically between 1,200 and 3,000 sq ft; build timelines commonly fall in the 4-9 month range depending on site work and finishes. Pre‑engineered trusses and open-span framing let you add a 500-1,500 sq ft shop or garage within the same envelope, cutting both material and labor compared with separate structures.

    Definition and History

    You should know the term began as barn-to-home conversions in rural America and evolved into purpose-built residences using post‑frame or steel building systems; barn construction techniques date back decades, while the label “barndominium” gained mainstream attention in the 2010s as prefab metal shells and DIY culture made them accessible to homeowners and builders alike.

    Benefits of Barndominium Living

    You get fast construction, high durability, and flexible floor plans that accommodate combined living and workspaces-per-square-foot costs often range $70-$150 depending on finishes, and metal exteriors substantially lower long‑term maintenance. Also, the open-span structure simplifies mechanical routing and gives you efficient, highly adaptable interiors compared with typical stick-built layouts.

    For more detail, you can leverage several concrete advantages: spray-foam or insulated-panel strategies push living-space R-values into the R-20-R-38 range for good energy performance; integrating a 1,000 sq ft shop into the same thermal envelope typically saves against building two separate structures; and in many rural zones permitting and site prep reduce development time. Prepare for lender and appraisal considerations-some financing requires builder experience-but the combination of speed, lower exterior upkeep, and customization makes barndos attractive for owner-builders and contractors seeking value and versatility.

    Planning Your Barndominium

    Prioritize permitting, site work, and a realistic schedule up front: expect 4-9 months from breaking ground to move-in for most builds, with permitting and site preparation taking 2-8 weeks. Budget for unforeseen site costs-graded driveways, drainage, and utility hookups can add $5,000-$25,000 depending on distance to mains. You should also lock in a contingency of 10-15% and get engineered plans to avoid costly mid-build changes.

    Choosing the Right Location

    Evaluate zoning, access, and utilities before committing: confirm zoning allows residential and accessory shop use, run a perc test for septic, and verify power and water availability. Aim for 1-5 acres for privacy and future expansion, avoid floodplains and steep slopes that inflate site prep, and factor setback requirements (commonly 20-50 ft) plus road access-gravel driveway construction can cost $6,000-$20,000 depending on length and terrain.

    Designing Your Space

    Decide early how much of your footprint is living versus shop-typical barndos range 1,200-3,000 sq ft with shop areas from 400-1,200 sq ft-and plan ceiling heights (12-16 ft for shop bays, 8-10 ft for living). Incorporate a clear thermal strategy: aim for wall R‑values around R‑20 and roof R‑38 in cold climates or equivalent spray-foam performance, and separate HVAC zones between workshop and residence to control dust and odor.

    Drill into structural and systems choices: determine whether a clear-span steel frame or post-and-beam will suit a 30-60 ft shop bay, size mezzanines for 200-500 lb/ft2 live loads if used, and ask an engineer to spec wind and snow loads per local code (e.g., 90 mph winds or 30-50 psf snow loads in many regions). You should also plan mechanicals-estimate 20-35 BTU/sq ft for heating load sizing depending on climate-specify acoustical separation and locked entry between shop and living, and use examples from similar builds (a 2,400 sq ft barndo with 1,000 sq ft shop often allocates 35-45% of budget to finishes and MEP systems).

    Securing Financing

    You should line up financing before finalizing permits and contracts: construction loans typically require 20-25% down and carry rates about 0.5-1.5% higher than comparable mortgages. Expect lender underwriting to take 2-6 weeks and require a fixed-price contract, detailed budget, and builder approval. For a $250,000 build you’ll likely need $50k-$62.5k down plus reserves; interest-only payments during construction convert to a permanent mortgage when the project is complete.

    Budgeting for Construction

    Itemize land, site work, foundation, shell, utilities, interiors, and permits-use quotes from at least three contractors. Plan typical ranges: site prep $5k-$50k, foundation $10k-$40k, shell $25k-$60k, finishes $30k-$80k depending on quality. Set a contingency of 10-15% and track all bids in a spreadsheet to compare scope, exclusions, and change-order policies.

    Exploring Loan Options

    Compare construction-to-permanent (single-close), standalone construction, HELOCs, and cash-out/portfolio loans; construction-to-perm is popular for new barndominiums because it converts without a second closing. Lenders usually expect a 680+ credit score, DTI under ~45%, and detailed draw schedules tied to inspections.

    Construction-to-permanent loans typically disburse funds in draws based on completion milestones-common draw breakdowns are foundation 20%, framing/envelope 30%, rough trades 30%, finishes 20%. You’ll pay interest only on amounts drawn; after final inspection the loan converts to a conventional mortgage. Lenders require a signed fixed-price contract, builder’s resume/insurance, line-item budget, and often 6 months of reserves. If your build is $200,000, plan for 4-6 draws, a 20% down payment ($40,000), and interim inspections that can add $500-$1,500 in fees to the closing costs.

    Construction Process

    During construction you juggle sequencing, inspections, and contractor coordination to turn plans into a finished home: expect 1-3 weeks for site prep, 2-4 weeks to complete foundations and erect the shell, then 8-16 weeks of mechanical, insulation, and finish work depending on scope-most builds land between 4-9 months. Schedule buffer time for utility tie-ins and two to four key inspections that can pause progress if issues arise.

    Foundation and Framing

    For foundations you’ll select slab-on-grade, pier, or shallow footing systems based on soil reports and frost considerations; footings, rebar, pour, and initial cure typically take 3-7 days with a 28-day concrete cure for full strength. Framing with post-frame trusses and metal sheathing can raise the shell in 7-14 days for a 2,000-3,000 sq ft plan, while precise squaring, anchor bolt layout, and an early framing inspection prevent costly rework.

    Exterior and Interior Finishing

    Exterior work often begins with metal panels and roofing while you order windows and exterior doors to match lead times; insulation choices range from fiberglass batt (R-13-R-21 walls) to closed-cell spray foam, and attic targets are typically R-30-R-49. Inside, you’ll sequence HVAC rough-in, plumbing and electrical, then drywall, trim, and flooring-expect 4-12 weeks for finish phases depending on custom cabinetry and appliance lead times.

    In practice you should install roofing and weather barrier before interior finishes to protect work. Choosing spray foam versus batts affects installation speed and airtightness-spray foam costs roughly 2-3× more than batts but simplifies sealing and reduces cold bridging in metal frames. Plan mechanical rough-ins and inspections before drywall; drywall taping plus paint for a typical 2,400 sq ft interior takes 7-14 days, while flooring choices like polished concrete or engineered wood change final touch timelines and cost.

    Utilities and Amenities

    Bring utilities online in logical sequence: trench for water and sewer before slab work, set the 200-amp electrical service and meter pad early, and coordinate gas and broadband conduits to avoid rework. You should decide between municipal sewer, septic, or a well based on lot tests; for a 3-bedroom layout a conventional septic system often requires a 1,000-1,500 sq ft drain field. Plan dedicated lines for high-load equipment like ovens, EV chargers, and workshop tools to prevent costly panel upgrades later.

    Installing Electrical and Plumbing

    Start electrical by sizing service-200 amps is common-and locating the main panel near future living zones; include AFCI/GFCI protection and 20A kitchen circuits. For plumbing, run a 3/4″ main with 1/2″ branch lines or use a PEX manifold for simplified shutoffs. Coordinate rough-in locations with cabinet and appliance layouts, and book inspections after rough framing: many builders schedule electrical and plumbing rough inspections together to keep a 4-9 month timeline on track.

    Heating, Cooling, and Insulation

    Choose systems that match the metal-frame envelope: mini-split heat pumps (9k-36k BTU heads) are efficient for open plans, while central HVAC may suit multi-zone designs; aim for wall R-values between R-13 and R-21 and attic R-38 to R-60 depending on climate. You should include a thermal break between metal siding and interior framing and consider closed-cell spray foam (≈6-7 R per inch) at eaves to control condensation and air leakage.

    Run a Manual J load calculation before purchase: a 1,800-2,200 sq ft barndo often needs 18k-36k BTU total heating/cooling capacity depending on insulation and glazing. Also factor in ventilation-an ERV/HRV can manage humidity and bring fresh air without major energy loss-and size ductwork to keep static pressure low; sealing ducts to under 5% leakage and using MERV 13 filters improves efficiency and indoor air quality.

    Landscaping and Outdoor Spaces

    Integrate grading, drainage and topsoil placement into your timeline: grade 2-4% away from the slab, spread 4-6 inches of screened topsoil, and stage planting after final irrigation is installed. You can allocate 30-50% native plantings to cut maintenance and water use; install 1-2″ mulch beds, and plan hardscape thresholds so patios and walkways tie directly to door elevations for seamless transitions.

    Enhancing Curb Appeal

    Frame your barndominium with a defined driveway and entry: choose crushed stone for a rural look at roughly $0.50-$1.50 per sq ft or concrete/pavers for a cleaner edge; add two low-voltage path lights per 25-30 feet, place one or two 15-25 ft canopy trees at least 20 ft from the building, and use symmetrical foundation plantings 3-4 ft high to balance the metal façade.

    Functional Outdoor Areas

    Design outdoor living to match how you’ll use it: allocate a 12’x12′ (144 sq ft) dining patio or 16’x20′ (320 sq ft) multi-use patio for seating and cook stations, place a 10-15 ft service clearance behind outdoor kitchens, and confirm setback and septic-clearance rules before siting decks, sheds or detached garages to avoid rework.

    Specify materials and technology for longevity: slope hardscapes 1/4″ per foot away from the house, use permeable pavers or gravel in high-drainage zones, run a dedicated 20-amp GFCI circuit for an outdoor kitchen, and locate fire features at least 10 ft from structures; these choices cut maintenance and meet most local inspections.

    Final Words

    Summing up, you can transform a blueprint into a functional barndominium by following methodical planning, smart material choices, and clear communication with contractors; your active involvement from site prep through framing to finishes keeps the project on schedule, within budget, and true to your design goals.

    FAQ

    Q: What are the major phases from blueprint to a finished barndominium?

    A: The process typically follows these phases: design and engineering (site survey, floorplan, structural drawings), permitting and utilities (permit applications, utility hookups, septic or sewer design), site preparation and foundation (grading, soil compaction, footings or slab work), shell construction (post-frame or steel frame erection, roof and wall panels), rough-ins (electrical, plumbing, HVAC installed and inspected), insulation and interior framing (insulation strategy, interior walls, vapor management), finishes and trim (drywall, flooring, cabinetry, fixtures), final inspections and punch list, and exterior grading/landscaping. Each phase can overlap; plan lead times for engineered drawings, permit processing, and material deliveries to avoid downtime.

    Q: How do I choose between a steel-framed barndominium and a post-frame (pole) system?

    A: Steel-framed systems offer high strength, long spans, and resistance to rot and pests; they can simplify rapid enclosure and allow open interior layouts. Post-frame (timber poles) tends to be less expensive for certain spans, integrates well with conventional wood framing interiors, and can be easier to modify on site. Consider local climate, desired interior layout, insulation strategy (thermal bridging is greater with steel), available contractors with experience in each system, and long-term maintenance. Obtain cost comparisons for the exact design and factor in foundation differences and connection details for the chosen system.

    Q: What foundation types are best for barndominiums and how should the site be prepared?

    A: Common options are slab-on-grade with thickened edges and frost footings, stem wall foundations with slab infill, and pier foundations for raised floors. Site prep requires soil testing to identify bearing capacity and drainage characteristics, clearing, cut/fill and compaction, and establishing proper drainage away from the building. Frost considerations determine footing depth in cold climates. Coordinate foundation design with structural engineer and local code requirements, and include sub-slab utilities and vapor barrier planning before pouring.

    Q: Which insulation and moisture-control methods work well for metal-sided barndominiums?

    A: Closed-cell spray foam at the roof and wall cavities provides high R-value, air sealing, and moisture control but is costlier. Open-cell spray foam offers air sealing but needs a vapor management strategy in cold climates. Fiberglass batts or rigid board with an interior vapor retarder combined with a thermal break can be economical if installed correctly and if condensation risk from metal panels is mitigated. Ensure continuous roof insulation or a well-ventilated roof assembly to prevent moisture buildup. Include ventilation, proper flashing, and a drainage plane behind exterior panels to control water infiltration.

    Q: What are typical timelines, major cost drivers, and how can I manage budget overruns?

    A: A straightforward barndominium shell can be erected in a few weeks; a complete finished build commonly runs 6-12 months depending on complexity, permit delays, and subcontractor scheduling. Major cost drivers are site work (grading, utilities, septic), foundation type, shell material and thickness, insulation and HVAC design, interior finishes (flooring, cabinetry, fixtures), and specialty systems (solar, radiant heat). To manage budget: get multiple bids, set a contingency (10-20%), lock in material selections early, phase work if needed, monitor change orders closely, and hire a project manager or general contractor experienced with barndominium builds to coordinate trades and inspections.

  • “Choosing The Right Barndominium Builders – Questions To Ask And Red Flags To Avoid”

    Many people building a barndominium underestimate how vital thorough vetting is; you should ask about the builder’s barndominium experience, licensing, insurance, warranties, subcontractors, timelines and change-order policies, verify references and past projects, demand a detailed written contract and clear estimate, and watch for red flags like vague terms, push for large upfront payments, or poor communication.

    Key Takeaways:

    • Verify credentials and experience: confirm license, insurance, portfolio of completed barndominiums and speak with past clients or visit finished sites.
    • Insist on a detailed written contract: scope, materials, timeline, payment schedule, change-order process and warranty terms to avoid surprises.
    • Watch for red flags: vague bids, reluctance to provide references or permits, cash-only requests, pushy sales tactics or poor communication-step away if these appear.

    Understanding Barndominium Builders

    What is a Barndominium?

    You already know the basic concept: a barndominium combines a metal post-frame or steel shell with finished living space, commonly 1,200-3,000 sq ft, delivering open-plan layouts and lower per-square-foot costs than stick-built homes. Builders often use steel framing, concrete slab floors, and insulated panels; expect a shell in 4-8 weeks and full finishes in 3-6 months, with insulation levels typically between R-21 and R-30 depending on climate and system choice.

    Key Attributes of a Good Builder

    You want a licensed residential contractor with general liability and workers’ comp, 5+ years of post-frame experience and a portfolio of 15-50 completed barndominiums, plus a written structural warranty (commonly 5-10 years). They should deliver itemized bids, clear change-order policies, three client references, and demonstrated knowledge of energy systems (R-values, air sealing) and local code compliance.

    In a 2022 survey of 120 barndominium owners, builders using a formal design-build approach averaged 12% under budget and finished about three weeks faster. You should request milestone dates (footings, shell, rough-in, finish), supplier names for steel and SIPs if used, recent site photos, signed lien waivers, and sample warranty language to verify their process and post-build support.

    Essential Questions to Ask Potential Builders

    Ask pointed questions about timeline, fixed-price vs. cost-plus contracts, allowance line items, and handling of change orders; request references for at least three finished barndominiums and visit one site if possible to see workmanship. Confirm who manages permits and inspections, whether the crew is in-house or subcontracted, and what warranties-structural, roofing, HVAC-are offered, including duration (e.g., 10-year structural).

    Experience and Portfolio

    Probe for the number of barndominium projects completed-ideally 10 or more-and request floor plans, material lists, and before/after photos. Ask about adaptations to local climate, such as spray-foam insulation for cold climates or elevated slab details for flood zones, and demand client contact info to verify on-time completion, budget adherence, and responsiveness.

    Licensing and Insurance

    Require proof of a current general contractor license and ask for the exact license number so you can verify it with the state board; many states require a license for projects over $3,000. Insist on general liability ($1,000,000 per occurrence/$2,000,000 aggregate) and worker’s comp certificates that list policy numbers and expiration dates.

    Call the issuing agency and the insurer to confirm active status and coverage limits; a Certificate of Insurance can be falsified, so verify with the carrier using the policy number. Confirm the license class covers residential barndominiums, ask whether subcontractors are covered or separately insured, and require you be named as additional insured during construction and on any performance or payment bonds.

    Evaluating Builder Communication and Responsiveness

    You should assess response time, clarity, and documentation: expect initial replies within 24-48 hours, written estimates within a week, and a sample communication plan. Ask if they use a project portal, weekly status reports, or photo logs; builders who provide milestone dates and an assigned project manager reduce surprises and help keep your budget and schedule on track.

    Initial Interactions

    You should test responsiveness by requesting a detailed estimate, scope of work, and a list of subcontractors up front. Pay attention to whether they answer permitting, zoning, and timeline questions with specifics, provide sample contracts, and supply references who confirm timeliness. Early transparency on allowances and change-order handling signals how they’ll manage your project day-to-day.

    Ongoing Communication Expectations

    You should set clear expectations for frequency and channels: require weekly written updates, immediate notification of schedule or cost impacts, and a single point of contact. Prefer builders who commit to a 24-hour reply window for questions and who document decisions with dated emails or portal entries to minimize disputes and keep all trades aligned.

    For more detail, insist on a communication matrix naming superintendent, project manager, and office contact plus preferred channels-phone for emergencies, email/portal for documentation. Require photo logs and weekly reports, an RFI process with a 48-hour turnaround, and a documented change-order workflow showing cost and schedule impacts before work begins. Using platforms like Buildertrend or Procore centralizes schedules, photos, and invoices so you can monitor progress and hold the team accountable.

    Identifying Red Flags

    Watch for vague timelines, frequent crew changes, missing permit documentation, or bids that are dramatically lower than others. If change orders regularly exceed 10-15% of the original contract, or the builder refuses to show proof of insurance, licensing, or a written warranty (at least one year on workmanship is common), you should be wary. Check for evasive answers when you ask for references or recent project photos; consistent avoidance often signals deeper problems.

    Unclear Contracts and Estimates

    Insist on a line-item estimate and a fixed-price contract that spells out scope, materials, brands, finish levels, and a clear payment schedule; avoid agreements that let the price float based on vague allowances. For example, be suspicious if a contract requires more than 10-20% upfront, has no change-order process, or lacks a defined completion date with liquidated damages or milestones tied to payments.

    Negative Reviews and References

    If multiple reviews highlight the same issues-missed deadlines, unresolved punch lists, or warranty disputes-that pattern matters more than a single bad comment. You should verify online complaints against the Better Business Bureau, state licensing board records, and the builder’s submitted references to see whether problems were resolved or persist.

    When you dig deeper, ask for three recent jobs within 50 miles and call those homeowners: did the final cost exceed the estimate and by how much (ask if it was over 10%), were there repeated subcontractor changes, did the builder honor the warranty and fix issues promptly, and would they hire the builder again? Also review permit records at the county office, inspect completed sites in person for quality details (framing alignment, flashing, finish gaps), and cross-check timestamps on social media or photo logs to validate claimed timelines.

    Comparing Quotes and Value

    Comparing Quotes – What to Check

    What to compare Actionable check
    Total price Ask for line-item breakdown; investigate bids that differ by more than 10%.
    Scope & exclusions Confirm which finishes, appliances, site prep, and hookups are included versus listed as allowances.
    Material specs Verify steel gauge, insulation R‑values (e.g., R‑21 vs R‑38), and brand names when relevant.
    Timeline & penalties Require a schedule with milestones and liquidated damages or extension clauses for weather.
    Subcontractors & licenses Obtain names, proof of insurance, and recent project references for key subs.
    Change orders Document markup rates and approval process; limit owner-paid deposits for changes.
    Warranties Compare workmanship vs manufacturer warranties (typical workmanship 1 year, structural 5-10 years).
    Payment schedule Avoid large upfront payments; reasonable down payments often sit at 10-15% with progress draws.
    Permits & inspections Clarify who pulls permits and provides inspection records to avoid surprises at closing.

    Cost vs. Quality

    You should weigh whether a low bid reflects lean efficiency or omitted items: materials and finishes commonly swing project cost by 20-50%, while labor often accounts for 30-40% of the total. Ask for samples or manufacturer specs, compare warranties, and get two-to-three comparable estimates; if one bid is 15% below the others, require a line-by-line clarification before assuming it’s the best value.

    Understanding the Fine Print

    You must read contract clauses on change orders, allowance caps, indemnity, and delay causes; vague language about “standard materials” or open-ended allowances frequently leads to costly add-ons. Require definitions for start/finish dates, scope of concealed-condition responsibilities, and a clear dispute-resolution path such as mediation before litigation.

    Examine payment triggers and retention terms closely: avoid contracts that demand more than 10-15% upfront or full payment at key milestone without verified lien releases. Also verify who is responsible for permit fees, utility connections, and soil tests-examples show owners paying unexpected $3,000-$8,000 fees when contracts leave those items ambiguous. Insist on written change-order pricing and a cap on subcontractor markup to control escalation.

    Final Checklist Before Choosing a Builder

    Before you sign, verify the license number with your state board, confirm active general liability (commonly $1M+) and workers’ comp coverage, review three recent barndominium projects, compare written warranty terms (e.g., 1-year workmanship, 10-year structural), and ensure the contract spells out timeline milestones, payment schedule, and permit responsibilities.

    Confirming Qualifications

    Verify the builder’s license status and insurance certificates, request a portfolio of at least 5 completed barndominiums or similar metal/post-frame projects, ask for three client references with contactable information, confirm the lead carpenter’s tenure (ideally 5+ years), and check for any liens or unresolved complaints on public records or the Better Business Bureau.

    Last Minute Questions to Ask

    Ask direct, written questions about deposit limits (typically ≤10-15%), payment milestones tied to measurable completions, how change orders are priced (flat fee vs. % markup, often 10-20%), who is your on-site superintendent, the procedure for permits and inspections, expected warranty response times (24-72 hours), and whether you’ll receive lien waivers at each payment.

    Phrase questions concretely: “What is the exact deposit and when is it refundable?”, “Can you provide a milestone schedule with dates?”, and “Show me a sample change-order form and hourly rates for extras.” Insist on written answers in the contract, obtain subcontractor names and insurance certificates, and log any verbal commitments in writing before proceeding.

    Conclusion

    Hence you should vet builders by asking about experience, portfolios, timelines, warranties and subcontractor use, checking references and permits, and insisting on clear contracts; walk away if they avoid specifics, pressure you, lack insurance, or give vague cost breakdowns-doing this protects your investment and ensures your barndominium is built to your standards.

    FAQ

    Q: What should I ask about a builder’s barndominium experience and portfolio?

    A: Ask how many barndominiums they’ve completed, request a portfolio with photos and floor plans, and ask for at least three recent references you can contact. Request to tour a finished project or an active job site if possible, and ask how they handle site-specific challenges like slab-on-grade vs. pier foundations, local zoning, and rural utility hookups.

    Q: How do I verify a builder’s licensing, insurance, and permitting practices?

    A: Request their contractor license number and verify it with the state or local licensing board. Ask for current certificates of general liability insurance and workers’ compensation, and confirm the insurer directly if necessary. Clarify who is responsible for pulling permits and scheduling inspections, and ask to see permit records for past projects to confirm compliance.

    Q: What contract terms, payment schedule, and warranties should I require?

    A: Insist on a detailed written contract that defines scope of work, materials, allowances, finish standards, start and completion dates, and a clear change-order process. Use a payment schedule tied to measurable milestones rather than large upfront sums. Require warranties for structural work and a list of manufacturer warranties for major systems; include lien-release clauses and a dispute-resolution method.

    Q: What questions about materials, systems, and customization help control cost and quality?

    A: Ask which structural systems they use (post-frame, steel frame, timber), the R-value and installation method for insulation, roofing and siding materials, window and door brands, and energy-system options (HVAC sizing, heat pumps, solar readiness). Request line-item estimates for upgrades and lead times for specialty items to avoid schedule delays. Ask how they handle finish selections and allowances to avoid surprise costs.

    Q: What red flags should disqualify a prospective builder?

    A: Watch for vague or overly low bids without a detailed scope, refusal to provide references or a portfolio, lack of current insurance or licensing, insistence on large upfront deposits, unwillingness to put terms in writing, poor communication or missed appointments, consistently negative online reviews, and high crew turnover or no clear project supervisor. Any attempt to bypass permits or pressure you to accept undocumented changes is a major warning sign.

  • Barndominium Cost Per Sq Ft – How to Budget Your Build

    There’s a clear method to estimate barndominium cost per sq ft so you can set a realistic budget and avoid surprises. By breaking costs into site prep, shell, systems, interior finishes, permits and labor, and applying local rate research plus a contingency buffer, you can forecast total spending, prioritize upgrades, and make informed trade-offs to keep your build on schedule and within budget.

    Key Takeaways:

    • Expect roughly $80-$200+ per sq ft for a barndominium; metal shell and basic finishes sit at the low end, full custom interiors and difficult sites push costs higher.
    • Major cost drivers are site prep and foundation, insulation and HVAC, utility hookups, and interior finishes-finishes and custom work have the biggest impact on per‑sq‑ft price.
    • Budget with an itemized estimator, include soft costs (permits, design, utility fees), and hold a 10-20% contingency for unexpected site or supply issues.

    Understanding Barndominium Costs

    When estimating your barndominium budget, separate costs into shell, foundation, interiors, site work and utilities; typical nationwide ranges run $80-$200+ per sq ft. You should plan for shell-and-basic-finish builds near $80-$120, mid-range installs $120-$160, and high-end custom finishes $160-$220+. Also factor in regional labor, permit fees and upgrades like enhanced insulation or vaulted ceilings, which can shift totals by 10-30%.

    What is a Barndominium?

    In practice, a barndominium blends an agricultural-style metal or post-frame shell with full residential finishes, giving you an open-plan living space often built from steel kits or converted barns. You’ll commonly see sizes from 1,200 to 3,000 sq ft; for example, a 40×60 kit (2,400 sq ft) can cost $40k-$80k for the shell, with finishes adding $120k-$300k depending on choices.

    Cost Per Square Foot Breakdown

    You can break costs into tiers: basic (shell, slab, minimal finishes) $80-$120/sq ft; mid-range (better insulation, standard kitchen/bath) $120-$160/sq ft; and high-end (custom cabinetry, premium HVAC, architectural touches) $160-$220+/sq ft. For context, a 2,000 sq ft mid-range build typically runs $240k-$320k, while a high-end version may exceed $400k.

    Digging deeper, line-item drivers include foundation type (slab-on-grade often $6-$12/sq ft), HVAC and ducting ($8k-$20k), and site prep ($5k-$30k for grading, drainage, driveways). You’ll add $10k-$40k for upgraded kitchens/bath fixtures and $5k-$15k for energy-efficiency upgrades; swapping a basic roof for standing-seam metal can add $6k-$12k but improves longevity and resale.

    How to Budget Your Build

    When you budget your build, convert your target per‑sq‑ft into a project total and layer in soft costs, site work, and contingency. For example, a 2,000 sq ft barndo at $120/sq ft is $240,000; adding 10% contingency and roughly 6% for permits/fees raises the estimate to about $269,400. Break the project into shell, interiors, utilities and permits so you can reallocate funds as design choices change.

    Establishing a Budget

    Start by listing hard costs (shell, foundation, finishes), soft costs (design, permits, inspections) and reserves. Typical splits: shell 30-50%, interiors 25-40%, site/utilities 5-15%, permits/fees 3-7%, contingency 5-10%, plus contractor markup of 10-20%. Use a spreadsheet to map these percentages to your sq ft total so you can see how a $10/sq ft upgrade to finishes impacts the overall price.

    Prioritizing Features and Amenities

    Decide which features deliver the most value to your lifestyle and resale: kitchens and primary bathrooms often consume 20-30% of interior budgets, while energy upgrades (insulation, windows, HVAC) may add 3-7% but lower operating costs. You can save by selecting mid‑range cabinets and fixtures-basic kitchens might be $10k-$20k, high‑end $30k-$60k-so prioritize what you use daily.

    Value‑engineer by phasing nonimportant items, choosing stock over custom where it won’t show, and allocating a clear upgrade line in your budget (for example, reserve 8-10% for finish upgrades). A concrete example: swapping custom cabinets for semi‑custom can cut kitchen costs by $5k-$12k, freeing funds for better windows or HVAC that improve comfort and long‑term savings.

    Key Factors Influencing Costs

    Major drivers include site conditions, shell type, finish level, and labor market; a steep lot with rock can add $10k-$50k for grading and blasting, while a flat rural parcel may only need $2k-$10k. You’ll also face permit, utility hookup, and foundation decisions-pier foundations vs slab vs full basement change both upfront and lifecycle costs. This impacts your per-square-foot target and contingency allocation.

    • Location & land development
    • Foundation and site prep
    • Shell type (metal kit vs stick-built)
    • Insulation, windows, and energy systems
    • Interior finishes and custom work
    • Labor availability, subcontractor rates
    • Permits, utilities, and inspections

    Location and Land Expenses

    Your land choices move the needle: rural land can be $1,000-$10,000 per acre in many areas, while suburban or scenic parcels commonly run $30,000-$200,000+ per acre. Expect site prep-grading, erosion control, culverts-at $2k-$15k; septic systems $3k-$10k; wells $3k-$12k; and utility hookups $1k-$10k depending on distance. Floodplain, steep terrain, or HOA restrictions add extra costs and design constraints.

    Material Choices and Suppliers

    Choosing a 26-gauge metal shell versus timber framing shifts both material and labor: standing-seam roofing installs about $5-$12/ft², metal wall panels $3-$8/ft², and insulated metal panels $8-$20/ft² installed; meanwhile lumber volatility has swung 1,000 board-feet from ~$400 to ~$1,500 in market spikes. You’ll see price differences between local dealers and national distributors, and lead times can add carrying costs.

    When you dig deeper, sourcing strategy matters: a pre-engineered steel building kit for a typical 40×60 shell (2,400 sq ft) often ranges $20k-$50k depending on gauge, truss system, and included extras, cutting framing labor by 30-50% compared with stick-built. Local suppliers may charge higher unit prices but reduce freight and allow faster replacements; national suppliers offer volume discounts but longer lead times and potential coordination fees. You should request itemized quotes, compare installed costs (not just material invoices), and push for fixed-price scopes or material price caps to limit exposure during volatile markets.

    Tips for Reducing Expenses

    You can shave thousands by standardizing your plan and prioritizing the shell: choosing common footprints like 30×50 or 40×60 cuts custom framing and foundation premiums, and a prefab metal shell can reduce framing time and labor costs by several thousand dollars on a 2,000 sq ft project. Opt to finish high-end surfaces later and lock prices on long-lead items. The biggest savings come from combining simplified design, bulk purchasing, and phased finishing.

    • Pick standard bay sizes to minimize custom steel and foundation costs.
    • Use a metal shell and open-plan layout to reduce labor hours and material waste.
    • Buy windows, doors, and appliances in bulk or during sales to save 10-25%.
    • Phase interiors-complete livable areas first to spread expenses over time.
    • Source reclaimed or clearance materials for accents to cut costs without degrading curb appeal.

    DIY vs. Hiring Contractors

    You can save 15-30% by doing cosmetic tasks yourself; on a $150,000 interior budget that equals $22,500-$45,000. Take on painting, trim, basic tile and cabinetry installation if you have time and tools, but hire licensed pros for structural steel, electrical, plumbing and HVAC to meet code and avoid costly rework; permits often require licensed sign-offs which you can’t DIY. Balance your time value against expected savings when choosing which trades to self-perform.

    Timing Your Build for Savings

    You’ll often get 5-10% lower contractor bids in slow seasons (late fall/winter) and better subcontractor scheduling; however, winter work can increase material handling and temporary heating costs. Shop appliances and fixtures during end-of-model sales or holiday promotions to save 10-25%, and order long-lead items (steel, windows) early to avoid 15-30% market spikes. Align your purchases with supplier lead times to lock prices and reduce rush premiums.

    Plan a 12-18 month schedule: submit permits before ordering long-lead items, place deposits to lock steel and window prices (lead times commonly 8-16 weeks), and sequence trades to take advantage of low-demand months. Account for weather-related cost adjustments-cold-weather concrete pours may add 5-15% for heaters or accelerators (a $6,000 slab could rise $300-$900). The phased-occupancy approach lets you complete imperatives first and add luxury finishes during off-season sales, spreading cost and reducing financing pressure.

    Financing Options for Barndominiums

    Mortgage Types for Barndominiums

    You’ll typically choose between construction-to-perm, renovation-backed, or conventional mortgages depending on lender comfort with metal/post-frame structures. Construction-to-perm loans usually require 20-25% down and interest-only payments during build; conventional mortgages can require 5-20% down and stricter appraisal rules for nonstandard homes. FHA 203(k) and Fannie Mae HomeStyle Renovation let you roll rehab costs into one loan, while VA and USDA offer zero-down options if you meet eligibility. Lenders often add 1-2% to the construction-rate compared to permanent financing.

    • Construction-to-Perm – funds construction, then converts to 15/30-year permanent mortgage.
    • FHA 203(k) – minimum 3.5% down; combines purchase and renovation under FHA limits.
    • Fannie Mae HomeStyle Renovation – conventional route for larger rehab budgets and flexible scopes.
    • VA/USDA – 0% down for eligible borrowers in qualifying areas or veterans with entitlement.

    After the build phase, expect to refinance or convert into the permanent mortgage agreed in your construction contract, typically within 6-12 months.

    Mortgage Type Typical Down Payment / Notes
    Construction-to-Perm 20-25% down; interest-only during build; converts to 15/30-year permanent.
    FHA 203(k) 3.5% down; purchase + rehab under FHA limits; lender approval required.
    HomeStyle Renovation Conventional down (5-20%); covers structural and cosmetic renovations.
    VA / USDA 0% down if eligible; USDA limited to rural areas and income caps; VA requires entitlement.

    Grants and Assistance Programs

    You can tap federal and state grants to lower upfront costs: USDA Section 504 grants provide up to $10,000 for very-low-income homeowners age 62+ for repairs, while many state Housing Finance Agencies (HFAs) offer down-payment assistance packages from $3,000 to $20,000. Community Development Block Grants and local nonprofit programs also fund energy upgrades or accessibility work; eligibility often depends on county income limits and property location, so check program rules early in planning.

    For more detail, search your state HFA and USDA Rural Development office-income limits commonly sit near 80% of Area Median Income (AMI) and vary by county. You can often stack DPA with FHA or conventional loans: a common example is combining a $10,000 state DPA with an FHA 203(k) to cover both down payment and $20k-$30k in renovations. Prepare pay stubs, tax returns, and property plans in advance to speed approval.

    To wrap up

    Upon reflecting on barndominium cost per sq ft, you should use realistic ranges, factor in site work, foundation, finishes, utilities, and local labor rates, and set a contingency of 10-20% for overruns. Prioritize decisions that control per‑square‑foot costs-plan efficient layouts, choose durable, cost‑effective materials, and get multiple bids-so you can create an accurate, flexible budget and avoid costly surprises.

    FAQ

    Q: What is the typical cost per sq ft to build a barndominium?

    A: National averages vary widely: a basic metal-shell barndominium with minimal finishes typically runs about $80-$120 per sq ft; a mid-range build with standard finishes and mechanicals is roughly $120-$170 per sq ft; high-end or fully custom builds can exceed $170-$300+ per sq ft. Regional labor and material prices, foundation type, utility hookups, and finish level drive these ranges. To estimate, multiply your planned heated square footage by the per-sq-ft range (example: 2,000 sq ft × $140 = $280,000).

    Q: Which factors most affect cost per sq ft and how should they be budgeted?

    A: Major cost drivers: site preparation and grading, foundation (slab vs. crawlspace vs. full basement), structural shell (steel frame, trusses, roof), insulation and envelope upgrades, windows and exterior doors, interior finishes (flooring, cabinetry, countertops), mechanical systems (HVAC, plumbing, electrical), permits/impact fees, design/engineering, and contractor labor. A typical allocation: shell/structure 30-40%, finishes 25-35%, mechanicals 15-25%, site/foundation 10-20%, soft costs (permits/design) 8-12%. Include a contingency of about 10-15% of total budget to cover unforeseen costs.

    Q: How do I create a realistic budget and keep the build on track to control costs?

    A: Steps: set a target cost per sq ft and total budget; define finish levels and a prioritized features list; obtain multiple detailed, itemized bids; choose contract type (fixed-price limits surprises; cost-plus can be flexible but riskier); use allowances for finishes to let you lock a price while selecting final fixtures; track expenditures weekly against line items; manage change orders tightly; keep a 10-15% contingency and reallocate savings toward priorities. Example budget: 2,400 sq ft × $140/sq ft = $336,000 construction cost + 10% contingency = $369,600. Cost-control measures: simplify rooflines and floor plan, use standard-sized windows and doors, phase nonimperative features, consider prefab trusses or panelized components, and buy long-lead items early to avoid price spikes.

  • State-wise Barndominium Costs – Compare Prices Across the US

    With regional labor, materials, and zoning differences affecting build costs, you need a clear state-by-state comparison to plan your barndominium budget. This guide presents average per-square-foot estimates, typical permitting and utility fees, and finish-level variations so you can gauge your potential investment, compare states side-by-side, and make informed decisions about location, design, and financing.

    Key Takeaways:

    • Costs vary widely by state-expect roughly $90-$200+ per sq ft depending on local labor rates, material prices, permitting, and climate-driven construction requirements; rural inland states tend to be cheaper, coastal and high-demand metros cost more.
    • Primary cost drivers are land and site work, foundation type, interior finishes, local labor availability, and building-code or weatherproofing needs; these can shift overall price more than the basic metal shell.
    • To lower or better predict costs, compare local builder quotes, consider barndominium kits or prefabrication, factor permitting and insurance into budgets, and check state-specific tax, zoning, and utility hookup expenses.

    Overview of Barndominiums

    Definition and Features

    You’ll find barndominiums are typically metal or post-and-beam shells converted into living space with open, clear-span interiors that accommodate lofts, shops, or RV storage. Sizes often range from 1,200 to 3,000+ sq ft, with concrete slab foundations and options like spray-foam insulation, mezzanines, and oversized garage doors. Costs vary by finish level-basic shell kits can run $40-$70 per sq ft while fully finished homes commonly fall between $90-$200 per sq ft depending on region and materials.

    Benefits of Barndominiums

    You get faster build times and lower structural costs because metal shells reduce framing labor, often cutting construction time by weeks compared with stick-built homes. Durable metal exteriors and simple rooflines mean lower maintenance and longer service life-many metal claddings last 40-50 years. Combining living quarters with workspace also trims site and utility costs, so a 2,000 sq ft barndo can cost 10-30% less than a comparable conventional house when you factor in the shop.

    For example, in several Texas case studies builders reported completing 2,400 sq ft barndominiums in 6-10 months for $120-$160 per sq ft, including attached shop space, versus $180-$220 per sq ft for similar stick-built homes. You should also expect easier customization-modular shell kits and open plans let you adapt layouts without major structural changes, which keeps renovation and expansion costs down.

    Factors Influencing Barndominium Costs

    Several variables shift your bottom line quickly; key drivers include:

    • Labor: coastal CA rates often run $60-90/hour vs rural TX $30-45/hour.
    • Site work & foundation: grading and a reinforced slab can add $5,000-25,000.
    • Permits, impact fees & utility hookups: typically $1,500-10,000 depending on jurisdiction.

    Thou should set a 10-20% contingency for code upgrades, unforeseen site conditions, and material price swings.

    Location Variability

    In high-demand states like California and parts of the Northeast, you’ll commonly see per‑square‑foot totals of $120-220, while in Midwest and rural Southern areas costs often fall to $70-100/sq ft; zoning, floodplain status, and distance from material suppliers can swing the final price by tens of thousands, so you should get localized bids and check county permit fees before budgeting.

    Material and Design Choices

    Choosing a steel shell with basic interiors typically puts the shell at $20-40/sq ft and interior build‑out at $40-100+/sq ft, so a 2,000 sq ft basic barndo might land near $120k-200k while high‑end finishes push beyond $300k; you should weigh metal versus wood framing, window counts, and roof pitch early to control costs.

    For more detail, you should quantify options: spray‑foam insulation on a 2,000 sq ft envelope commonly adds $3,000-8,000, upgraded windows $8,000-20,000, and a poured perimeter foundation can exceed a slab by $10k-30k; open‑plan layouts reduce interior partition costs but add HVAC sizing needs, and custom millwork or masonry facades quickly raise the per‑square‑foot total.

    State-wise Barndominium Cost Analysis

    You’ll find stark contrasts when comparing states: labor and materials push prices from roughly $70/sq ft in low-cost rural areas to $300+/sq ft in high-regulation markets, with typical regional ranges-Northeast $120-$200, South $70-$140, Midwest $80-$130, West $150-$300-shaped by permitting, code upgrades, and local contractor availability that directly affect your final budget.

    Northeastern States

    In states like Massachusetts and New York you’ll pay more for labor and tight permitting-expect $120-$200 per square foot; seismic retrofits are rare but older urban lots often require costly site work, while insulation upgrades for cold climates add $3,000-$8,000 to typical builds, particularly if you pursue high-end finishes in commuter-friendly counties.

    Southern States

    Texas and Florida usually deliver the best price-per-square-foot, often $70-$140, yet hurricane zones force you to invest in reinforced roofs, impact windows, and elevated foundations, which can add $10,000-$50,000 depending on elevation and design choices.

    When you build in the South, soil and flood considerations frequently alter foundation strategy: choose a slab-on-grade to save $5,000-$15,000 versus deep piers, but in FEMA flood zones you’ll likely face $10,000-$30,000 in elevation and drainage work plus higher insurance costs that affect long-term ownership expenses.

    Midwestern States

    Ohio, Indiana, and Iowa commonly offer competitive labor rates yielding $80-$130 per square foot; you’ll need robust insulation and heating systems for long winters, and frost depth drives foundation choices-standard foundations suffice in many counties, but deeper footings raise excavation costs by several thousand dollars.

    Expect your Midwest build to save on material haul distances, yet face extra winterization costs: frost-protected shallow foundations or heated slabs can add $3,000-$8,000, and snow-load-rated roofs may increase framing and roofing expenses compared with southern builds.

    Western States

    In California and Colorado you’ll see the top end of the spectrum-$150-$300+/sq ft-because seismic engineering, stringent permitting, and wildfire-resistant materials like ember-proof vents and Class A roofing add both design fees and construction premiums to your budget.

    Specifics to plan for include engineered shear walls and foundation tie-downs that can add $10,000-$40,000 in high-seismic zones, while wildfire mitigation-non-combustible siding, defensible space grading, and specialty windows-often contributes $5,000-$25,000 depending on lot exposure and local code requirements.

    Cost Comparison of Barndominiums by Size

    Cost ranges by size (national averages)

    Size Typical Cost Range
    Small (800-1,200 sq ft) $80,000-$220,000 (~$100-$180/sq ft)
    Medium (1,200-2,400 sq ft) $144,000-$432,000 (~$120-$180/sq ft)
    Large (2,400-5,000+ sq ft) $288,000-$1,000,000+ (~$120-$300/sq ft)

    Small Barndominiums

    If you opt for a small build (800-1,200 sq ft), expect roughly $100-$180 per square foot depending on finishes and region; a basic shell kit can drop per‑square‑foot costs into the $50-$90 range. You’ll save on foundation and HVAC complexity, and many buyers in the Midwest report completing livable small barndominiums for about $90k-$160k when choosing standard finishes and local labor.

    Medium Barndominiums

    For medium sizes (1,200-2,400 sq ft) you’ll typically pay $120-$180 per square foot, with total builds commonly falling between $144k and $432k; these layouts often include 2-3 bedrooms plus a workshop bay, balancing living space and utility. You’ll face moderate increases in electrical, plumbing, and insulation costs compared with small plans, and a midrange finish package usually pushes the price toward the upper half of that band.

    As an example, a 1,800 sq ft midrange build at $150/sq ft runs about $270,000; upgrade the kitchen, add hardwood and higher‑R insulation and that same footprint can approach $350k-$400k. You should also factor regional variance-builds in Texas or Tennessee often run 10-20% below national averages, while California and the Northeast can be 20-40% higher due to labor and permitting.

    Large Barndominiums

    When you move into large builds (2,400+ sq ft), economies of scale can lower base per‑square‑foot costs, but typical ranges expand to $120-$300+/sq ft because of custom trusses, high‑end finishes, and added systems; total costs commonly start near $288k and can exceed $1M for bespoke estates that include workshops, apartments, or premium materials.

    A concrete example: a 4,000 sq ft custom barndo at $200/sq ft is about $800,000; add zoned HVAC, commercial‑grade windows, and engineered mezzanines and you can easily exceed $900k-$1.1M. You should also budget for larger foundation work, more complex permitting, and potential utility extensions-these line items often add $20k-$80k on rural large builds.

    Financing Options for Barndominiums

    When arranging financing, you can choose from construction-to-perm loans, conventional mortgages, USDA and VA programs, or renovation-specific products; construction loans typically carry short-term interest about 0.5-2% above long-term mortgage rates, while permanent rates often fall in roughly 3.5-6.5% depending on credit and region. Lenders will review plans, contractor qualifications, and a detailed budget; you should plan for a 10-20% contingency and expect stricter appraisal and inspection requirements than for a standard home loan.

    Loan Types and Rates

    Construction-to-perm loans fund the build then convert to a mortgage, often priced 0.5-1.5% above prevailing mortgage rates; conventional loans usually require 10-25% down but offer competitive long-term rates. FHA 203(k) covers renovations with lower down payment but tighter appraisals, USDA supports rural builds with low/no down payment where eligible, and VA may apply for veterans if occupancy and appraisal rules are met.

    • Construction-to-perm: short-term interest during build, single closing reduces fees.
    • Conventional: better long-term rates if you can supply 10-25% down and strong credit.
    • The lender will require detailed builder contracts, line-item budgets, draws schedule, and contractor licensing/insurance documentation.
    Construction-to-Perm Typically 0.5-1.5% above mortgage; converts to permanent loan
    Conventional 10-25% down common; long-term rates ~3.5-6.5%
    FHA 203(k) Lower down payment; focused on rehab, strict appraisal rules
    USDA Rural 0-5% down in eligible rural areas; property must meet program criteria
    VA Loan 0% down for qualified veterans; occupancy and appraisal conditions apply

    Budgeting for Construction

    You should split your budget roughly 50-60% for hard construction (shell, systems, finishes), 10-20% for soft costs (permits, design, inspections), and 10-20% contingency; for example, on a $250,000 project expect $125-$150k hard costs, $25-$50k soft costs, and $25-$50k reserved for changes or overruns. Site work can add $5k-$40k depending on grading and utilities.

    Dig into line items: get contractor bids that separate shell, MEP, finishes, and site prep so you can value-engineer-switching from stick framing to a prefab metal shell can lower framing/labor by 15-25%, while upgrading insulation from R-19 to R-30 might add $2-4 per sq ft but cut energy bills long-term. Track change orders tightly, require draws tied to inspections, and keep a 10-20% unfinished-work reserve; doing so reduces lender pushback and helps you hit schedule and budget targets.

    Tips for Reducing Barndominium Costs

    Trim unnecessary complexity: simplify the footprint, choose a metal shell, and buy bulk materials to cut costs-many owners shave 10-25% off budgets this way. Use standard 4’x8′ modules to reduce waste, select off-the-shelf windows instead of custom sizes, and phase nonimperative finishes to spread expense. Consider sourcing reclaimed wood or discounted appliances to save $2,000-$8,000 on fixtures.

    • Choose a rectangular plan and simple rooflines to lower framing and labor-savings can approach 15-20% on structural costs.
    • Buy lumber and fasteners in bulk or through dealer auctions; a 2,000 sq ft build can save $3,000-$7,000 this way.
    • Use prefab components like trusses and panelized walls to cut on-site time by weeks and labor costs by thousands.
    • Recognizing local permitting, soil work, and utility hookups often add $3,000-$15,000, plan accordingly to avoid last-minute premium charges.

    Cost-effective Design Strategies

    Favor a compact, modular layout: keeping your barndominium close to 1-1.5 stories and using a 24-36 foot bay spacing reduces steel and roof costs by up to 20%. Specify off-the-shelf doors and windows, use exposed metal ceilings where acceptable, and select energy-efficient HVAC right-sized to the envelope-investing an extra $1,500 in insulation can lower annual heating/cooling bills by 15-30%.

    DIY vs. Hiring Contractors

    Doing some work yourself can cut total costs 10-30%-painting, interior trim, and landscaping are typical DIY tasks that save labor fees. If you have carpentry experience, installing siding or nonstructural partitions may save $5,000-$15,000 on a modest build. Weigh time, skill, and the potential cost of correcting mistakes when deciding which tasks to take on.

    For systems tied to safety and code-electrical, plumbing, structural connections-hire licensed pros: electricians average $50-100/hr and plumbers $45-90/hr, but their work prevents failures that can cost $5,000-$30,000 in fixes or delays. Use a hybrid approach: plan to DIY finishes while contracting inspections and critical installs to protect your timeline and resale value.

    Summing up

    Conclusively, state-by-state barndominium prices vary significantly, so you should compare regional averages, local labor and material costs, permitting and land expenses, and climate-driven design needs to set realistic expectations. Use multiple contractor bids, factor in code compliance and site prep, and allocate a contingency to ensure your budget covers unforeseen local variations.

    FAQ

    Q: What drives differences in barndominium costs from state to state?

    A: Several interrelated factors create wide state-to-state variation. Local labor rates and contractor availability are often the largest drivers – states with higher wages and unionized labor push per-square-foot costs up. Building codes and required energy or seismic standards (California, Alaska, parts of the Mountain West) increase structural, insulation, and foundation expenses. Material transport and availability matter: remote or island states raise delivery and import costs. Site conditions (rocky ground, steep slopes, flood zones) raise site-prep and foundation costs, while permit, impact fee, and inspection regimes add variable administrative costs. Property taxes, insurance rates, and local contractor markup also shift totals. Finally, chosen finish level (shell-only vs. fully finished interior) multiplies base structural cost by large factors, making two identical shells in different states end up with very different final prices.

    Q: Which states tend to be the most and least expensive for building a barndominium, and what are typical per-square-foot ranges?

    A: Rough national ranges (all-in finished home) typically fall between about $70-$300+ per square foot depending on state and finish level. States often on the lower end include Mississippi, Arkansas, Oklahoma, Kentucky, and some rural parts of Texas and the Midwest, where typical finished costs commonly run $70-$115/ft². Mid-range states include large parts of Texas, Georgia, Tennessee, Ohio, and North Carolina with $90-$160/ft². High-cost states include California, New York (especially metro areas), Massachusetts, Hawaii, and Alaska where finished costs frequently fall in the $150-$300+/ft² range. Urban vs. rural within each state matters: metropolitan counties add premiums for labor, incentives, and permitting. Example totals: a 2,000 ft² barndominium might cost roughly $140k-$230k in lower-to-mid states and $300k-$600k+ in high-cost states depending on finishes and site conditions.

    Q: How do I estimate the total cost for a specific state and what practical steps reduce expenses?

    A: Estimation steps: 1) Choose target finished-per-square-foot range for that state (use local builders or recent local builds for reference). 2) Multiply by planned conditioned square footage. 3) Add site-prep and foundation allowances (typical $5k-$50k depending on soil and slope). 4) Add utility hookup, septic/well, and driveway costs ($3k-$30k+). 5) Factor permits, impact fees, and inspections ($1k-$10k). 6) Add contingency of 10-20% for overruns. Formula: Total ≈ (sqft × local $/ft²) + site prep + foundation + utilities + permits + contingency. Cost-reduction tactics: pick a simpler rectangular footprint and single-level design, locate where access and deliveries are easy, buy a pre-engineered kit or standardized plan, lock materials early to avoid market spikes, use local contractors with fixed bids, phase nonnecessary interior finishes, and perform permitted owner-contractor work where legal and safe. Obtain three local bids and check recent comparable builds to refine the per-square-foot assumption for that state and county.

  • Barndominium Money-Saving Tips – Cut Costs Without Compromising Quality

    Just prioritize smart design, material choices, and phased construction to lower your barndominium costs without sacrificing quality; you can save by combining efficient layouts, sourcing reclaimed or wholesale materials, negotiating with contractors, doing selective DIY, and investing in long-term energy-efficient systems that reduce future expenses. These strategies help you achieve a durable, attractive barndominium while keeping budgets under control.

    Key Takeaways:

    • Optimize design and layout to reduce foundation and framing costs-simpler shapes, shared walls, and open plans lower material and labor expenses.
    • Choose durable, low-maintenance materials and energy-efficient systems (steel shell, engineered wood, quality insulation, efficient windows) to reduce long-term costs without sacrificing quality.
    • Phase the build, obtain multiple bids, use prefabricated components, and handle non-structural DIY tasks to cut labor costs while verifying warranties and contractor credentials.

    Understanding Barndominiums

    When you evaluate barndominiums, focus on how merging a metal or post-frame shell with residential finishes changes cost drivers: material-heavy exterior shells reduce framing labor, open-plan layouts lower interior partition costs, and shell-first kits can shave months off schedules. Typical sizes run 1,200-3,000 sq ft, build times often 3-6 months, and per-square-foot totals vary widely by finish level, so you can trade higher-performing envelopes for savings elsewhere without sacrificing quality.

    Definition and Benefits

    You get a hybrid structure-usually a metal or timber shell designed for mixed-use living and workshop space-where benefits include lower framing costs, rapid enclosure with pre-engineered kits, flexible layouts that minimize interior finish area, and potential energy savings when you specify continuous insulation and efficient HVAC; many owners see 10-30% structural savings versus comparable stick-built footprints.

    Definition & Benefits at a glance

    Typical shell type Steel frame or post-frame with metal siding
    Common sizes 1,200-3,000 sq ft
    Build time 3-6 months (kit + trades)
    Primary savings Framing labor, faster enclosure, shared shop/garage areas
    Energy potential High with continuous insulation and sealed metal shell

    Cost Comparison to Traditional Homes

    You’ll typically pay less per square foot for a barndominium’s structure: reasonable ranges are about $70-$150/sq ft for barndos depending on finishes, versus $100-$250/sq ft for conventional stick-built homes; shell kit costs often run $20k-$60k, and that upfront lower structural expense shifts budget toward interior finishes you control to balance quality and savings.

    You can model a specific scenario: a 1,800 sq ft mid-range barndo might total $130k-$270k depending on finishes-shell $30k-$50k, slab $6k-$12k, mechanicals $15k-$35k, interiors $60k-$150k-whereas a similarly sized traditional home often lands 15-35% higher due to stick framing, longer labor, and higher finish-area costs; your choices on insulation R-value, HVAC efficiency, and finish level drive final parity or advantage.

    Cost Comparison Snapshot

    Typical shell cost Barndo: $20k-$60k ¡ Traditional framing: $40k-$100k
    Avg. cost per sq ft (mid-range) Barndo: $90-$150/sq ft ¡ Traditional: $120-$220/sq ft
    Build time Barndo: 3-6 months ¡ Traditional: 6-12+ months
    Main variable costs Finishes, foundation type, HVAC, insulation

    Budgeting for Your Barndominium

    Plan for predictable costs and buffer for surprises: allocate a 10-15% contingency and factor soft costs-permits, design fees, site prep-at roughly 8-12% of the build. Use a per-square-foot estimate to gauge feasibility: if your market averages $110-$160/sq ft, a 2,000 sq ft shell will run $220,000-$320,000 before finishes. Track bids to refine your numbers as you go.

    Setting a Realistic Budget

    Start by defining your target scope, then price shell, systems, finishes, and site separately. Expect shell and systems to consume about 60-70% of construction dollars, finishes 20-30%, and permits/site 5-10%. For example, on a $240,000 project you might allocate $150,000 to structure/mechanical, $60,000 to finishes, and $30,000 to site/fees; update those allocations after three contractor quotes.

    Identifying Essential vs. Non-Essential Costs

    You should prioritize the envelope, foundation, structural framing, HVAC, plumbing, and electrical-these protect value and typically absorb the largest share of your budget. Defer high-end cabinetry, luxury flooring, and extensive landscaping until after occupancy; those non-important items can be upgraded later or handled piecemeal. Aim to keep discretionary spending under 30% until importants are locked in.

    You should audit line items on each contractor bid: compare unit prices for trusses, insulation R-values, window U‑factors, and HVAC tonnage. Balance upfront savings against lifecycle costs-for example, choosing mid-grade windows with a lower U‑factor reduces energy bills over decades. Swapping $3,500 solid-surface counters for $800 quality laminate can free funds to upgrade insulation or install a more efficient HVAC system that saves you 10-20% annually on heating and cooling.

    Choosing Cost-Effective Materials

    Factor lifecycle costs into every material choice so you avoid cheap short‑term fixes; metal siding can run $2-5/ft² for material only but often outlasts wood and cuts maintenance 30-50% over 20 years, while a simple concrete slab foundation typically takes 8-12% of total build cost-opt for engineered lumber where it saves 10-25% on framing labor and waste, and compare installed vs. material‑only prices before committing.

    Durable and Affordable Materials

    You can lower long‑term expense by prioritizing durable, low‑maintenance options: standing‑seam metal roofs commonly install for $3-7/ft² and last 40+ years, insulated metal panels improve R‑values and reduce HVAC sizing, and engineered floor joists or trusses reduce onsite labor and minimize waste-use pre‑engineered kits to cut framing time 20-40% and front‑load savings into components that pay back over the building’s life.

    Sourcing Materials Wisely

    You should pursue multiple supply channels to stretch your budget: buy direct from manufacturers for bulk discounts (often 5-15%), scout contractor closeouts, and compare local mills versus big‑box pricing; ordering materials in palletized batches lowers per‑unit freight, and planning purchases to hit vendor seasonal sales can save you thousands on a typical 2,000 ft² build.

    Negotiate terms like returns, delivery windows, and staged shipments so you avoid costly rush fees-pool orders with neighboring builds, use reclaimed elements (windows or barn wood) to cut finish costs 30-50% when labor is available, and get written quotes for lead times to prevent change‑order markups; one builder saved about $7,000 by buying metal panels direct and scheduling deliveries to match the framing pace.

    DIY vs. Hiring Professionals

    When to DIY

    You should take on non-structural, time-flexible tasks like painting, trim, interior doors, sealing concrete, and installing batt insulation to save 20-40% on labor; these tasks require basic tools and reduce contractor hours. For work tied to code or safety-electrical, HVAC, plumbing, foundations, and load-bearing framing-hire licensed pros to avoid failed inspections and costly rework that can exceed $5,000 on a single mistake.

    Finding Reliable Contractors

    You should shortlist contractors by verifying state licenses, liability and workers’ comp insurance, and at least three local references; request three written, line-item bids and compare timelines. Expect a barndominium shell plus basic finishes to run roughly $80-$150 per sq ft depending on region and materials. Favor contractors with documented barndominium or post-frame experience to avoid learning-curve change orders.

    You should also check permit history and past project photos, confirm they pull permits, and require written warranties and lien waivers. Use phased payments (example: 10% deposit, 30% at framing, 30% at cladding, balance on completion), cap change-order rates, and get a clear punch-list process; one owner avoided a $5,200 overrun by insisting on an itemized bid and strict milestone payments.

    Design Tips to Save Money

    Pinpoint high-impact choices that lower structural and long-term costs: a simple rectangular shell reduces foundation and roof complexity, clustering wet areas cuts plumbing runs, and open plans lower interior framing-choosing a 40×60 rectangle instead of multiple wings can reduce framing and roofing costs by 10-20%.

    • Favor compact shapes (rectangles or squares) to cut foundation perimeter and roof edges, which directly lowers material and labor costs.
    • Group plumbing and mechanicals-stack bathrooms and kitchens to shorten pipe and duct runs and reduce installation time and parts.
    • The orientation and window placement for passive solar reduce heating and lighting loads, cutting energy bills significantly.

    Simplifying the Floor Plan

    When you simplify the floor plan, you slash framing and foundation expenses-fewer corners mean less lumber and a smaller concrete perimeter; for example, reducing exterior corners from six to four can trim foundation costs by roughly 8-12%. Place bathrooms back-to-back or on a single wall to cut plumbing by up to 20%, and limit interior partition lengths to save on drywall and labor while keeping circulation efficient.

    Maximizing Natural Light and Energy Efficiency

    You can lower both upfront and operating costs by designing for daylight and thermal efficiency: orient glazing to the south with 15-25% glazing-to-floor-area for passive gain, use overhangs to prevent summer heat, and specify low-E double-pane windows (U‑value ~0.30-0.35) to balance heat loss and gain while reducing electric lighting needs by around 30%.

    For more detail, prioritize high R-values and airtightness: aim for R-38 in the roof and R-20 to R-21 in walls (or continuous insulation equivalent) for temperate climates, seal penetrations tightly to get blower-door results near 3-5 ACH50, and use LED lighting plus occupancy sensors to cut lighting energy another 40-75%. Add clerestory windows or light shelves every 12-15 feet to distribute daylight, and plan roof orientation and pitch to accommodate future solar panels for a payback that often falls within 6-12 years depending on local incentives.

    Financing Your Barndominium

    For financing, you’ll often combine a construction loan with a permanent mortgage, use a construction-to-perm product, or pursue manufacturer/metal-building package financing that accepts 10-20% down. Construction loans typically require 70-80% loan-to-cost, may carry interest-only payments during the build, and use monthly draws tied to inspections. You should budget for 5-10% contingency, show detailed cost breakdowns to lenders, and expect stricter documentation than a standard home loan.

    Exploring Loan Options

    You can pursue conventional mortgages, FHA 203(k) rehab financing (3.5% down if eligible), USDA rural loans with 0% down for qualifying parcels, or VA loans with no down payment for veterans. Construction loans commonly ask for higher credit scores-often 650-700-and may charge rates 1-2 percentage points above permanent mortgages. Private lenders and hard-money options exist for faster approvals, but they demand larger reserves and higher interest.

    Grants and Incentives for Barndominiums

    You should hunt federal, state, and local programs that offset costs: the federal solar Investment Tax Credit currently covers about 30% of eligible photovoltaic costs, state energy-efficiency rebates often range from a few hundred to several thousand dollars, and USDA or state rural development programs can offer grants or forgivable loans for low-income or elderly homeowners in rural areas. Check eligibility early to stack savings with your financing plan.

    Search resources like grants.gov and the DSIRE database to identify specific incentives in your county; state housing finance agencies and local extension offices often list repair grants, weatherization programs, and property-tax agricultural/use exemptions that can lower operating costs. You’ll want to document timelines and application windows-some energy rebates require pre-approval-so coordinate grant applications with permit and loan milestones to maximize rebates and avoid missed opportunities.

    Final Words

    To wrap up, you can cut costs on your barndominium by prioritizing durable materials, combining DIY with selective professional labor, standardizing dimensions to reduce waste, shopping auctions and reclaimed resources, and planning efficient systems that lower long-term expenses; consult multiple bids, lock in fixed-price contracts where possible, and focus savings on features that maintain resale value so you don’t sacrifice quality for short-term savings.

    FAQ

    Q: What are the most effective ways to cut upfront construction costs without sacrificing build quality?

    A: Prioritize a simplified, efficient design-open floor plans, standard-sized windows and doors, and fewer interior partitions lower material and labor costs. Use a certified metal building kit or prefab components to reduce onsite labor, and request multiple detailed bids to compare scope and pricing. Value-engineer with your contractor: substitute equivalent, lower-cost materials (e.g., engineered lumber or structural insulated panels) where they won’t affect performance. Bulk-purchase long-lead items, schedule work to avoid costly delays, and hire experienced trades or a good GC to prevent rework. Combining these steps commonly trims 10-25% from initial budgets depending on choices and location.

    Q: How can I reduce long-term operating and maintenance expenses for a barndominium?

    A: Invest in a well-sealed thermal envelope-high R-value insulation (spray foam or continuous rigid insulation), taped seams, and proper air sealing cut heating and cooling loads. Size HVAC systems correctly and consider heat pump technology for efficient year-round conditioning. Specify energy-efficient windows, LED lighting, programmable thermostats, and low-flow plumbing fixtures. Add durable exterior materials, proper roof flashing, and good drainage to minimize maintenance. Consider solar panels or battery-ready wiring if future electrification is planned. These measures raise upfront cost modestly but lower utility and maintenance bills over the building’s life.

    Q: Where is it unsafe to cut costs, and how can I still save without compromising those areas?

    A: Do not skimp on the foundation, structural framing, roofing/waterproofing, proper moisture control, or licensed electrical and plumbing work-shortcuts here lead to expensive failures. To save without risking these elements, phase non-structural finishes (flooring, cabinetry) so you can upgrade later, perform cosmetic DIY work if competent, use reclaimed or surplus finishes in low-impact areas, and buy durable but mid-range fixtures that offer long warranties. Secure fixed-price contracts for structural scope to avoid surprise costs, and keep thorough documentation to preserve resale value and warranty claims.

  • “Breaking Down Barndominium Costs – How To Budget For Every Stage Of Your Build”

    Build a realistic barndominium budget by breaking costs into land, shell, systems, finishes, and contingencies so you can plan each phase with confidence; this guide shows how to estimate expenses, prioritize spending, track change orders, and allocate contingency funds to avoid surprises, helping you make informed trade-offs and keep your project on schedule and within scope.

    Key Takeaways:

    • Break the project into stages (land/site prep, shell, utilities & insulation, interior finishes) and budget line-by-line using per‑sq‑ft benchmarks for each phase.
    • Include a contingency (typically 10-20%) and budget separately for permits, utility hookups, grading/septic and other common hidden expenses.
    • Reduce costs by comparing contractor quotes, using prefabricated components or kits, standardizing dimensions and doing selective DIY, while hiring pros for structural and MEP work.

    Understanding Barndominium Costs

    Initial Cost Factors

    You’ll face land, site prep, shell, utilities and permit costs up front; typical build costs run $90-$180/ft² (a 2,000 ft² barndo at $120/ft² = $240,000). Common line-items include:

    • Land purchase and access ($30k-$100k+ depending on region)
    • Site prep and foundation ($10k-$40k)
    • Shell/framing and exterior (varies widely by materials)
    • Utilities, septic/well, and permits ($5k-$30k)

    The shell and finishes often consume 50-70% of your build budget.

    Ongoing Expenses

    Expect utilities, HVAC, insurance, property taxes and routine upkeep after move-in; energy costs commonly run $150-$400/month, insurance $800-$2,500/year, and property tax often 0.5-2% of assessed value. You should budget an annual maintenance reserve of 1-2% of your home’s value to cover repairs and replacements.

    Digging deeper, your metal shell reduces exterior repainting but increases focus on insulation (aim for R-30+ in cold climates) and condensation control; inadequate insulation can raise heating bills by 20-40%. Plan for HVAC replacement every 15-20 years ($5k-$12k), septic or well service ($500-$3k routine; $3k-$10k for major repairs), and roof-related work-metal roofs last 40-70 years but fasteners and flashings may need attention every 10-20 years. Using the $240k example, a 1.5% maintenance reserve equals $3,600/year, which covers periodic systems maintenance, small structural repairs, and emergency funds so you don’t erode your build investment over time.

    Budgeting for Land Acquisition

    You should allocate roughly 10-20% of your total barndominium budget to land acquisition and immediate expenses; for a $300,000 build plan $30,000-$60,000. Include purchase price, 2-5% closing costs, boundary and topographic surveys, and initial site work like clearing, driveway access, and erosion control. Urban-edge lots command premiums, while rural acreage lowers per-acre cost but raises utility extension and roadwork expenses.

    Evaluating Potential Locations

    Assess zoning, floodplain status, setback requirements, and proximity to utilities before bidding. Order a soil perc test ($300-$700) and a topographic survey ($500-$2,000) to confirm septic and grading needs; a failed perc can eliminate a site. Also factor commute times, school districts, and planned nearby development since those influence resale value and long-term costs.

    Land Purchase Costs

    Expect wide price ranges: many rural acres run $2,000-$15,000/acre, suburban fringe $50,000+/acre, and finished lots $30,000-$150,000 depending on region. Add closing costs (2-5% of purchase), title insurance, recording fees, and any HOA or special assessment charges when setting your allocation.

    Plan for site-specific add-ons that often exceed the purchase price: septic systems $3,000-$10,000, drilled wells $4,000-$15,000, grading and driveway work $2,000-$25,000, and utility hook-up or extension fees $1,000-$20,000. Note land loans usually demand 20-50% down and higher interest than construction loans, so consider seller financing, land-home packages, or combining loans to lower carrying costs.

    Planning Your Build

    When planning, break your budget into stages: site prep and foundation (15-25%), shell and envelope (35-45%), interior finishes and systems (30-40%), and soft costs like permits and design (5-10%). Expect 6-12 months for a typical 1,800-2,400 sq ft barndominium from permit to move-in, and budget a 10-15% contingency for material price swings and schedule delays. You should also sequence purchases-order long-lead items like trusses and windows early to avoid bottlenecks.

    Choosing the Right Design

    Start with the footprint and workflow: a 1,500 sq ft single-level reduces foundation and HVAC costs versus a 2,500 sq ft two-story. You’ll save by choosing a simple gable roof, standard bay sizes (24×36, 30×40), and an open-plan interior; complex rooflines, extensive glazing, or second-floor mezzanines can increase design and framing costs by 10-30%. Factor in local climate-insulation and snow-load requirements affect truss design and cost.

    Factors Influencing Design Costs

    Design fees depend on complexity, who prepares plans, and site constraints: stock plans run $500-$3,000, while architects charge $3,000-$25,000 or 5-12% of construction. Site work for slope, soils, or septic can add $1,500-$20,000 for reports, grading, and engineering. Local permitting and energy-code compliance often add $200-$2,000 and can require additional structural or mechanical design changes that raise costs.

    • Complexity: multiple rooflines, extensive glazing, and custom trusses increase drafting time and fees.
    • Scale: per-square-foot design fees drop with larger projects, but total design cost rises with size.
    • Site constraints: steep sites or poor soils typically require geotech reports and engineered foundations.
    • Any custom features-built-in millwork, clerestory glazing, or exposed timber framing-commonly add 10-30% to design and engineering costs.

    In practice, converting a $1,200 stock plan with $800 of local revisions usually stays under $2,500, whereas an architect at 8% on a $300,000 build would be about $24,000. Pre-engineered metal shell kits cost roughly $8-$12 per sq ft for the shell and can cut framing time by weeks, but they limit some layout options. Also plan for permit review windows of 2-8 weeks and energy compliance testing that can run $500-$2,500.

    • Purchase stock plans and budget modest local revisions to save several thousand dollars versus full custom design.
    • Use pre-engineered metal shells to reduce shell labor and shorten schedules, accepting some layout constraints.
    • Schedule design and permitting early to avoid financing or subcontractor hold costs from extended plan review.
    • Any post-permit change orders typically incur higher rates and material markups, often adding 15-40% to affected line items.

    Construction Costs Breakdown

    When tallying construction costs for a barndominium, expect wide ranges: typical builds run roughly $80-$200 per sq ft, with shell/envelope and interior finishes taking the largest shares. You should budget by category-foundation, structural steel, roofing, windows, utilities-and assign percentages to each stage to match your design. For a mid‑range 2,000 sq ft project at $120/ft², anticipate around $240,000 total before hidden fees.

    Labor and Material Expenses

    Labor typically consumes 30-50% of your total build cost, while materials account for 40-60%; exact splits depend on prefabrication and owner‑installed work. You’ll pay more for specialized trades-steel erectors, HVAC, and electricians-where hourly rates commonly run $50-$120. On a $200,000 job, plan for $60k-$100k in labor and a similar range in materials, with high‑end finishes pushing material costs upward.

    Hidden Costs to Consider

    Permit, hookup and site service fees can add $500-$10,000; septic systems often cost $3,000-$12,000 and utility hookups vary $2,000-$15,000. You also face engineering and stamped plans ($1,000-$5,000), delivery/crane charges ($500-$2,500/day), sales tax on materials, and storage or temporary utilities while you build. Set aside a contingency of 10-15% to cover these predictable extras.

    For example, a 2,000 sq ft barndo estimated at $120/ft² ($240k) can incur $12k-$36k in hidden expenses (5-15%), plus change orders that commonly add another 10-20% if scope shifts. You should request line‑item bids for hookups, get firm prices for specialty work, and track allowances so change orders are minimized; a dedicated 10-15% contingency plus a separate $5k-$10k buffer for site surprises keeps your budget realistic.

    Financing Options

    Types of Loans Available

    For barndominium projects you’ll typically choose construction-to-permanent, FHA 203(k) or renovation loans, USDA rural loans where eligible, VA renovation loans for veterans, or a conventional mortgage after framing; construction loan interest often runs 3.5-6% during the build and down payments commonly range from 5-20% depending on lender experience with post-frame builds.

    • Construction-to-permanent: single close, staged draws, converts to mortgage when complete.
    • FHA 203(k): bundles rehab into mortgage, lower credit thresholds but loan caps apply.
    • USDA Rural: 0% down in qualifying rural areas, subject to income and location limits.
    • VA Renovation: no down payment for eligible veterans, requires appraisal and entitlement.
    • Any lender you choose should demonstrate prior barndominium or pole-frame appraisals to avoid funding delays.
    Loan Type Key Features
    Construction-to-Permanent Single close, draw schedule, converts post-construction
    FHA 203(k) Renovation financing, lower credit bar, loan limits
    USDA 0% down for eligible rural properties, income caps
    VA Renovation No down payment for qualified veterans, entitlement required

    Tips for Securing Financing

    You should present a full build package-site plan, licensed contractor bid, materials list-and target a credit score above 680 for best terms; aim for 10-20% reserves, secure multiple preapprovals, and ask lenders about their experience with mixed-use or post-frame appraisals.

    • Assemble a detailed budget and contractor contract to validate the scope and timeline.
    • Clear or reduce high-interest debt and correct credit errors before applying.
    • Compare APR, origination fees, and rate lock periods across at least three lenders.
    • This demonstrates to lenders you have contingency funds and reduces perceived risk.

    If you can show a 15% down payment plus a six-month cash reserve and a fixed-price contract from a licensed builder, lenders commonly offer better terms (often 0.25-0.5% lower rate); you should also include a 5-10% contingency line item in your budget for site surprises and material price swings.

    • Collect written subcontractor quotes and a detailed materials list to support cost estimates.
    • Provide soil, perk, and site survey reports to shorten underwriting and reduce surprises.
    • Keep organized bank statements covering 2-3 months as proof of reserves and liquidity.
    • This level of documentation frequently speeds underwriting and improves approval odds.

    Cost-Saving Tips

    You can shave 10-30% off total costs by prioritizing high-impact savings early: selecting standard-sized trusses, buying materials in bulk, and scheduling trades to avoid downtime. If you opt for used or surplus steel, you might cut shell costs 5-15%; choosing energy-efficient windows can lower long-term utility expenses. Perceiving trade-offs between upfront savings and maintenance needs helps you avoid false economies.

    • Buy standard-dimension materials to reduce waste and cut costs 8-12%.
    • Source surplus steel or reclaimed siding to lower shell expenses 5-15%.
    • Phase finishes so necessarys are done first and upgrades are deferred.
    • Bundle trades or offer flexible scheduling to negotiate 5-10% discounts.
    • Invest in efficient systems (e.g., 95% AFUE furnace) to reduce operating costs.

    DIY Options

    You can save 15-40% on finishing labor by doing painting, trim, flooring installation, and basic landscaping; for example, painting 1,800 sq ft can save $1,500-$3,000 versus hired crews. Focus on non-permitted tasks and kit assemblies, and outsource licensed work like structural welding or electrical to avoid fines and rework.

    Negotiating with Contractors

    Get three itemized bids and compare line-by-line, push for a fixed-price contract to limit surprises, and offer timing flexibility to reduce labor premiums-these tactics commonly yield 5-15% savings. Request supplier invoices to verify markups and propose small early-payment discounts (2-3%).

    Insist on an itemized scope, set a payment schedule (example: 10% deposit, 40% at shell completion, 40% at systems/insulation, 10% retainage), cap change-order markups (e.g., 10%), require lien waivers on payments, and include liquidated damages for delays (such as $100-$500/day). Verify licenses, insurance, and references before signing and keep a 5-10% contingency for negotiated extras.

    Summing up

    Taking this into account, you can confidently budget for every stage of your barndominium by mapping costs to design, site prep, shell, interiors, utilities, and finishing; build a realistic contingency, get multiple bids, schedule payments to match milestones, and track expenditures closely so scope changes don’t derail your plan. Working with experienced contractors and prioritizing must-haves lets you balance quality and cost while keeping your timeline and finances under control.

    FAQ

    Q: What is the typical cost per square foot for a barndominium and what factors drive that range?

    A: Typical costs range from about $80 to $200+ per sq ft depending on finish level and location. A basic shell (steel frame and exterior) can be $30-70/sq ft; foundation and slab $8-20/sq ft; mechanical, electrical and plumbing (MEP) $10-30/sq ft; insulation and envelope upgrades $5-25/sq ft; interior finishes and cabinetry $20-80+/sq ft. Land, site work, permits and utilities are extra. For example, a 2,000 sq ft build can be roughly $160,000 at $80/sq ft for a no-frills build, $300,000-$400,000 for mid-range, and $400,000+ for high-end finishes or difficult sites.

    Q: How should I budget for land acquisition and site-preparation costs?

    A: Treat land and site prep as a separate line item equal to a significant percentage of total project cost, because ranges vary widely. Land price depends on region; site prep typically runs $3,000-$50,000+: clearing and grading $1,000-$15,000, driveway $2,000-$20,000, septic $3,000-$10,000, well drilling $3,000-$15,000, erosion control and retaining work more if slope is steep. Also budget utility hookups and permit or impact fees ($500-$10,000+). Mitigation steps: get a survey and soil test before purchase, choose flatter lots to reduce excavation, verify utility access and septic suitability to avoid surprise costs.

    Q: How do I allocate my budget across the build stages so I don’t overspend in one area?

    A: Use staged percentage targets: planning and permits 5-10% (design, engineering, permit fees); shell/exterior (steel structure, roofing, exterior doors) 25-40%; foundation and slab 8-15%; MEP (HVAC, plumbing, electrical) 15-25%; insulation and weatherproofing 5-15%; interior finishes, cabinetry and flooring 15-30%; landscaping and final site work 2-8%; contingency 5-15%. Example for a $300,000 build: $15k-$30k planning, $75k-$120k shell, $24k-$45k MEP, $45k-$90k finishes, plus $15k-$45k contingency and site costs. Track spend by stage and hold back contingency until late-stage overruns or change orders.

    Q: What soft costs and permits should I include in my budget that owners often overlook?

    A: Include architectural/engineer fees (3-8% of construction cost), permit fees (varies by jurisdiction), impact or connection fees, plan review fees, utility hookup deposits, inspection fees, and insurance during construction. Also account for surveying, soil reports, and any required environmental or wetlands studies. If using a contractor, include construction management or general contractor markup and allowances for change orders. Unexpected delays can add financing interest and storage costs for materials-factor those into the soft-cost contingency.

    Q: How much contingency and what financing approach should I plan for to cover surprises during the build?

    A: Set contingency at 10-15% for custom barndominiums; increase to 15-20% if site conditions or scope uncertainty are high. Use a construction loan with draws tied to inspections to control cash flow, or a fixed-price contract for defined scopes to shift some risk to the contractor. Compare options: self-funding gives flexibility, construction-to-permanent loans simplify closing but require thorough draw management, and government renovation loans have specific rules and limits. Require written change-order procedures, schedule payments by milestones, and prioritize purchasing long-lead items early to avoid price escalation.